
It's important to know an application inside out when you spend a lot of time in it. And for most iOS & Mac developers, Xcode is the application they spend virtually all of their time in. In this article, we've compiled 7 tips that help you become more productive with Xcode 12.
1. Decide Where to Open a File
In Xcode, you can open a file in various ways: in the standard editor, in a new or existing assistant editor, in a new or existing tab, or in a new window. Here's how you can decide about this:
- When clicking on a file in the Navigator, hold down SHIFT + OPT
The first visible editor will be highlighted and you can move that selection by moving the mouse cursor over another open editor to open the file there. You can also move the cursor to the edge of the window to open the file in a new editor there.
2. Navigation
You shouldn't waste your time digging for a file in your folder hierarchy. Instead, you can use Xcode's "Open Quickly" dialog (CMD + SHIFT + O). Simply start typing any part of the file's name - it doesn't even have to be consecutive letters: "mwinco" will find your "MainWindowController" class.
As if this wouldn't be cool enough, this dialog also lets you decide which editor to open the file in: hold down CMD + OPT + SHIFT while double-clicking the file to open.
If you opened a file with the "Open Quickly" dialog and want to jump to its location in the navigator pane, you can press CMD + Shift + J to do so.
Another handy shortcut when editing or reviewing source files is Ctrl + 6 which opens a menu in the navigation bar that contains all classes, properties and methods of the current source file and allows filtering by just typing away. Selecting a method from this menu jumps to its position in the source file. No need to scroll around the source file or scan the mini map.
Xcode also makes it easy to open associated files by pressing Cmd + Ctrl + Arrow Up/Down. In the case of Swift source files, this will open a generated file that contains just the interface.
Last but not least, you can show an "Action" popover for the code under the caret by pressing Cmd + Shift + A. This popover gives you access to actions like showing quick help, jumping to the callers of a method, the definition of a type or variable and refactoring actions like "Extract to Method".
3. Custom Code Snippets
Whenever you find yourself typing the same bits of code multiple times, you should create a code snippet.
To do that, write a piece of code and remember to insert placeholders for values you have to fill out when invoking the snippet (e.g. <#token#>). Then highlight code in the editor, right-click on the selection and select "Create Code Snippet" from the context menu.
Besides from naming it, you should also define a "Completion Shortcut": when you type these letters later, Xcode will offer to substitute them with your custom snippet. You can also define the scope in which the snippet is offered in the autocomplete window, e.g. only within a function.
You can search, edit and delete snippets in the library dialog that can be opened via Cmd + Shift + L.
Read more about custom code snippets in Apple's documentation.
Download the Xcode Cheat Sheet
With tips, tricks, keyboard shortcuts - and 5 more of our most popular cheat sheets.
4. Tabs
Tabs are well-known from almost every IDE and text editor. However, two things make tabs in Xcode especially powerful:
a) You can configure each tab individually. For example, one tab could contain just two editor panes, while another one could contain the project navigator, a single editor pane, and the utilities area. Thereby, you can configure tabs that are optimized for different use cases (like coding, debugging, interface builder tasks, ...).
b) Tabs are persisted in a workspace. When opening the project again, Xcode restores the tabs - including their unique structure. This makes it worth while to take some time to configure your "perfect" setup.
c) By pressing "CMD + Opt + Shift + T" or clicking "Window > Rename Tab…" in the main menu, you can assign it a name. Named tabs can then be used in "Behaviors" (see below).
5. Behaviors
With "Behaviors", you can tell Xcode how to react when certain events happen. For example, you could have the console view shown whenever your app starts running; or you could have a new tab opened whenever you start a search.
This gets even more powerful when combined with named tabs. For example, whenever your app pauses, you can have Xcode open your named tab "Debug" - a tab that you configured exactly how you want it to look (maybe with an assistant editor and the debugger shown, but the project navigator hidden...). You have to keep that tab open to use it in the way you configured it. If you close it, the the behavior will create a new tab with this name, but without the custom configuration.
Behaviors can be configured in Xcode's preferences window.

Read more about behaviors in Apple's documentation.
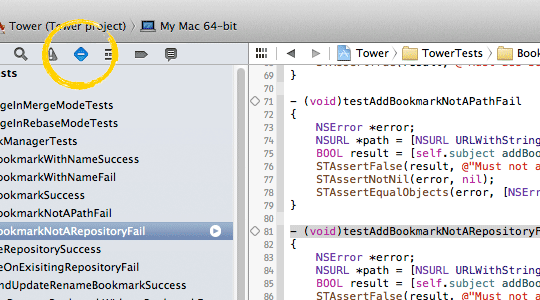
6. Tests
In Xcode, the Navigator pane on the left offers a new "Test" tab. You can execute individual tests very elegantly by using the little arrow buttons:
- All tests in a certain file (arrow button on the right side of the Navigator)
- A certain test method only (in the line number column directly in the file)
In addition, there are very handy keyboard shortcuts to speed up the process of running tests:
- "Cmd + U" will run all tests for the currently selected scheme
- "CMD + Opt + Ctrl + U" will run the test case where the caret currently is
- "CMD + Opt + Ctrl + G" will run the last test again
Read more about the Test Navigator in Apple's documentation.
7. Breakpoints
There are multiple ways to debug a program. A very common (and effective) approach is to log text to the console. However, this carries the risk that you ship code that contains debug logging statements that may expose sensitive data to the system log. It also requires a recompilation of the program to introduce new log statements.
Luckily, Xcode breakpoints are a quite powerful tool. You can attach actions to a breakpoint, including a "Log Message" action, that prints to the console. Using this technique, you avoid shipping debug log statements and you gain the ability to add logging without having to recompile the program. A huge time-saver!

Another awesome time-saving feature is the ability to modify values using a "Debugger Command" action. If you want to execute the code within an if statement, you could change the value in code and force the execution this way, but it carries the risk of shipping the temporary change to customers if you forget to revert it.
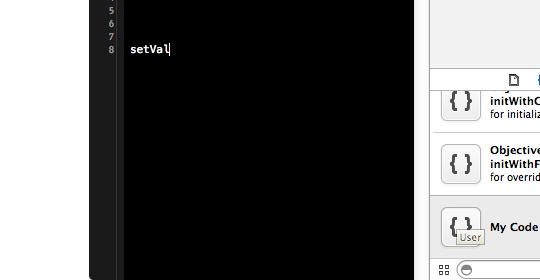
A faster and safer approach is to modify the respective value with a breakpoint by using the LLDB command expression myValue = true and set the breakpoint to auto-continue.

Finally, you can share breakpoints with others by clicking on "Share Breakpoint" in the context menu of the breakpoint in the breakpoint navigator. Committing shared breakpoints to the Git repository makes them available to all your teammates.

There is a lot more to learn about breakpoints and LLDB that is well worth the time.
Download the Xcode Cheat Sheet
With tips, tricks, keyboard shortcuts - and 5 more of our most popular cheat sheets.