
In this tutorial, we will walk you through the step-by-step process of configuring SSH for commit signing. We will learn how to generate SSH keys, configure Git and GitHub to utilize them, and see how commits can be signed and verified using SSH.
SSH is a robust and widely used solution for providing verifiable proof of authorship and protecting against unauthorized tampering. In the world of Git, SSH can prove that a commit was truly made by a specific person.
SSH isn't limited to just commits. It also enables developers to securely connect to remote servers hosting their repositories (like GitHub) and perform various Git operations, such as cloning, pushing, pulling, and branching.
How Does SSH Work?
SSH employs strong cryptographic algorithms to encrypt data, preventing unauthorized access and eavesdropping during transmission. This encryption ensures that sensitive information, such as login credentials and code changes, remains protected from prying eyes.
It utilizes public-key cryptography, where developers generate a key pair consisting of:
- a public key, which is added to the remote server.
- a private key, which remains securely stored on the local machine.
So, let's get started, shall we?
Let's fire up the terminal, as most of our actions will take place in the command line.
💡 Not a fan of the Terminal? You can also set up SSH keys with 1Password 8. Check out our guide on how to generate SSH keys and sign commits with 1Password.
Generating a New SSH Key
On Linux and Mac, use the following command to generate a new SSH key, with your email as a label:
$ ssh-keygen -t ed25519 -C "your_email@example.com"This command utilizes the Ed25519 algorithm, which is recommended nowadays as Ed25519 keys are more secure and performant than RSA keys. However, since RSA is the most popular public-key algorithm, some legacy systems may not support Ed25519.
If necessary, you can generate an RSA key instead with the following command (4096 is the recommended bit-length):
$ ssh-keygen -t rsa -b 4096 -C "your_email@example.com"You will be prompted to choose a location to store the key and whether to set a passphrase. By default, keys will be stored under /Users/USERNAME/.ssh/.
You can verify this by running the following command, which lists both your private and public keys:
$ ls ~/.sshAdding Your New SSH Key to the ssh-agent
SSH keys should be protected by a password. To avoid entering the password repeatedly, there is an "SSH agent" process that acts as a keyring and securely manages keys and their passphrases.
Keys can be manually removed from the agent as needed. Keep in mind that upon system restart, all keys will be removed from the agent and need to be re-added.
Let's start by listing the current keys in the agent using the following command:
$ ssh-add -lIf you have been following along with this tutorial, you shouldn't have any SSH keys listed. The output should show "The agent has no identities.".
Let's add our first key to the agent! If you haven't changed the default folder and file name, you can use the following command:
$ ssh-add ~/.ssh/id_ed25519You should receive a confirmation message saying "Identity added." If you run ssh-add -l again, you should see your SSH key listed now.
If necessary, you can also remove an SSH key. The following command will remove a specific key (using a capital "D" would remove all identities):
$ ssh-add -d PATH_TO_KEYWhen adding a key, you can store the key's password in the keychain using the following command:
$ ssh-add --apple-use-keychain PATH_TO_KEYThe next time you add the key, the password will be automatically retrieved from the keychain, simplifying the process. You can also load all keys stored in the keychain at once, which can be useful after a system restart:
$ ssh-add --apple-load-keychainCreating an SSH Config File
When using SSH to connect to multiple remote systems, it can become cumbersome to remember all the IP addresses, ports, and usernames. While creating aliases is one option, OpenSSH provides a better solution.
OpenSSH allows you to set up a per-user configuration file where you can store different SSH parameters for each specific remote machine you want to connect to.
If the config file doesn't exist initially, you can create it by running the following command:
$ touch ~/.ssh/configMake sure the file is only readable and writable by the user by changing its permissions:
chmod 600 ~/.ssh/configTypically, an SSH config file looks like this:
Host hostname1
  SSH_OPTION value

Host hostname2
  SSH_OPTION value
  SSH_OPTION value
For example, if you frequently log in with ssh bruno@dev.git-tower.com -p 2380, you can simplify it by adding the following lines to the config file:
Host tower
  HostName dev.git-tower.com
  User bruno
  Port 2380
  IdentityFile ~/.ssh/id_ed25519
Pretty cool! Now you can simply use ssh tower to log in to the remote machine. This makes connecting to remote machines much easier. However, we still need to add the public key to remote servers.
In this example, we'll use GitHub as the remote server.
Adding Your Public SSH Key to GitHub
If you try running the following command, it will result in an error:
$ ssh -T git@github.com
❯ git@github.com: Permission denied (publickey).
To resolve this, let's go to GitHub's Settings and navigate to the SSH and GPG keys panel.
Click on "New SSH key", provide a name, and leave it as an Authentication Key. Next, you will need to paste the public key, which you can obtain with the following command:
$ pbcopy < ~/.ssh/id_ed25519.pubAfter pasting the key and clicking on "Add SSH key," let's run that first command again:
$ ssh -T git@github.com
❯ Hi brunofbrito! You've successfully authenticated, but GitHub does not provide shell access.
Great! It seems like we're in! This means we can now clone repositories via SSH, for example.
You're all set to perform remote operations on GitHub now, but we still won't be able to sign commits. Let's change that next.
Signing Commits with SSH
To sign commits using SSH, we need to make some adjustments to the Git config:
$ git config --global gpg.format sshThis command configures Git to use SSH for signing. Next, we need to specify the public SSH key to use:
$ git config --global user.signingkey ~/.ssh/id_ed25519.pubFinally, to sign commits, you have two options. You can either set Git to sign all commits by default (globally in any local repository with the --global flag) using the following command:
$ git config --global commit.gpgsign trueOr, if you prefer, you can sign individual commits by adding the -S flag when making a commit:
$ git commit -S -m "YOUR_COMMIT_MESSAGE"
# Creates a signed commit
Finally, we need to create an "allowed signers" file, which is a list of trusted keys that Git can use. You can place this file anywhere you prefer, but we suggest storing it under the ~/.config/git/ folder.
To inform Git about this file in the global Git config, use the following command if you chose the same path:
git config --global gpg.ssh.allowedSignersFile "~/.config/git/allowed_signers"Now, let's create the "allowed signers" file itself. We need to add the email and public key to this document, following this format:
bruno@git-tower.com ssh-ed25519 AAAAC3NzaC1lZDI1NTE5AAAAIFZSV8LQpdNrwUrR4jB8eHnuH6ZKuqJwjdmis1UUBXG1You can add multiple users if you wish, with each user's email and public key on a separate line.
Once you have added a signed commit and run git log --show-signature, you should be able to view the signature status for the commits, confirming that everything has worked successfully. We're almost there!
Verifying Commits on GitHub
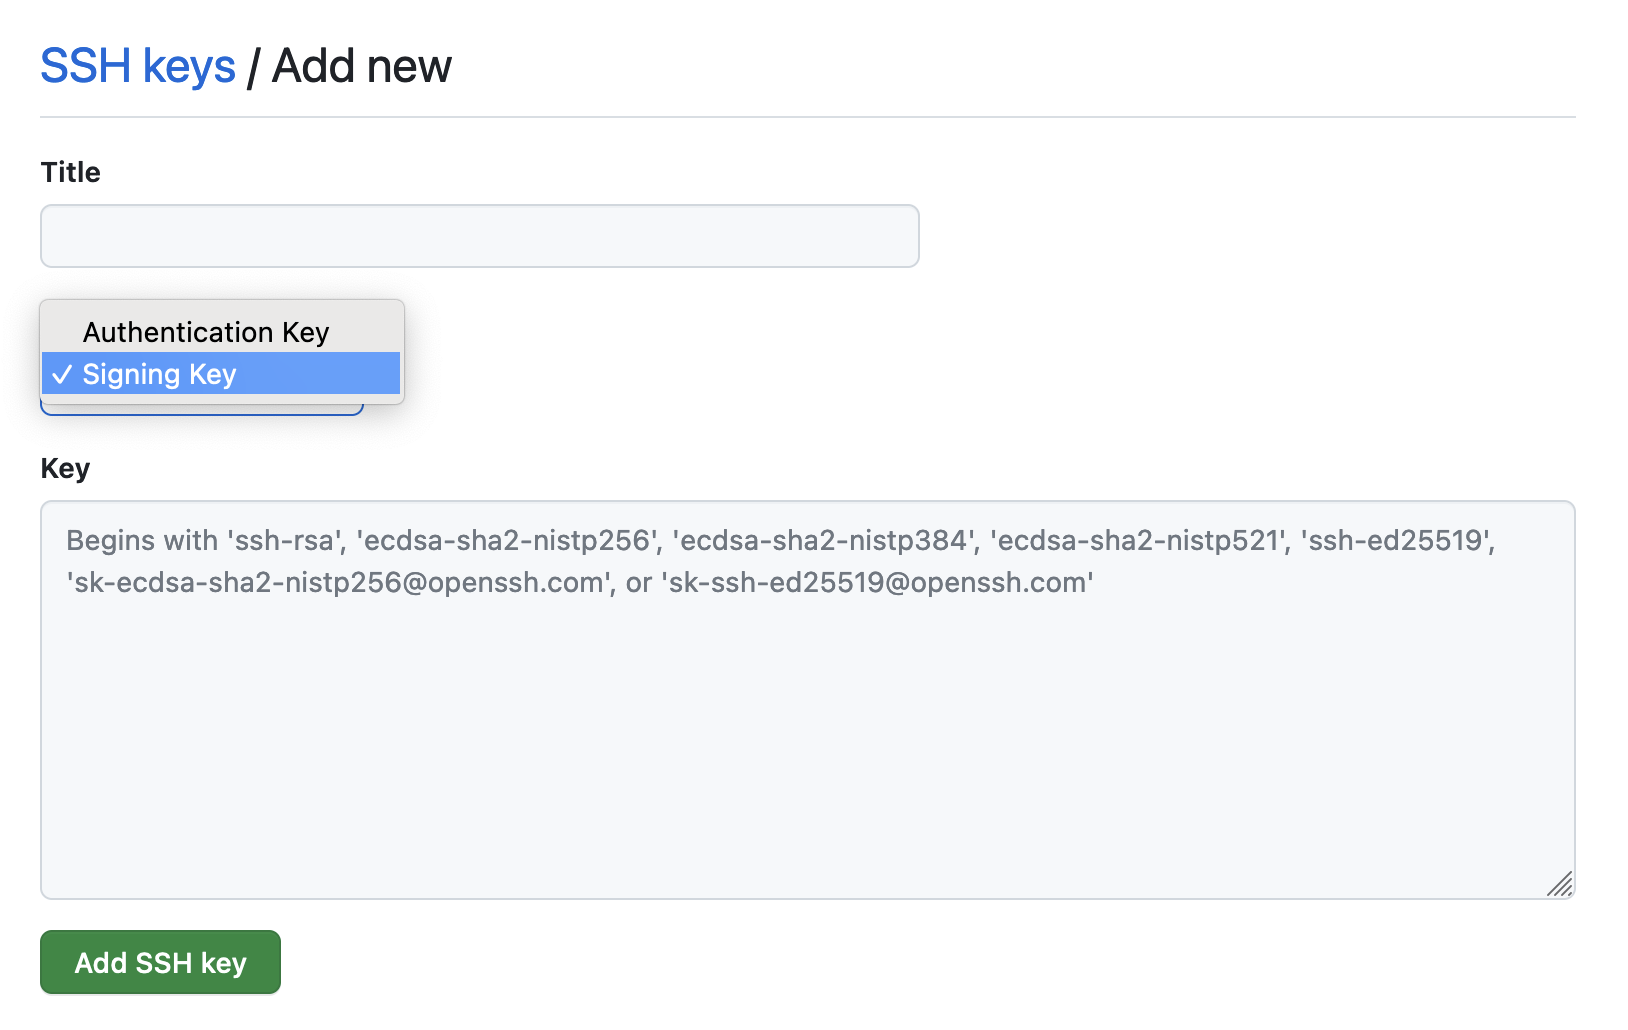
Now that everything is working locally, we need to make a few adjustments in GitHub's Settings. In the SSH and GPG keys panel, let's add a new SSH key. This time, we'll change the "Key type" to Signing Key.
You should now see a "Verified" label next to your commits.

Congratulations! You've successfully finished this tutorial ✌️
SSH and Tower
Tower, our Git client, offers seamless SSH integration. With Tower, you can manage SSH keys and associate them with your user profiles to sign commits with ease.
It is also possible to quickly verify the signing status of commits and tags.
Learn more about our SSH integration by checking out our release blog post.
We hope that you found this guide useful. For more tips, don't forget to sign up for our newsletter below and follow Tower on Twitter and LinkedIn!
Join Over 100,000 Developers & Designers
Be the first to know about new content from the Tower blog as well as giveaways and freebies via email.