
Setting Up GPG on Windows (The Easy Way)
GnuPG (more commonly known as GPG) is used to encrypt and decrypt files. When working with Git, we rely on GPG to sign commits and tags. It's useful to verify if those actions were really performed by that person.
In this tutorial, you will learn how to set up GPG on Windows. The process is very simple and should only take you about 5 minutes.
Let's get started!
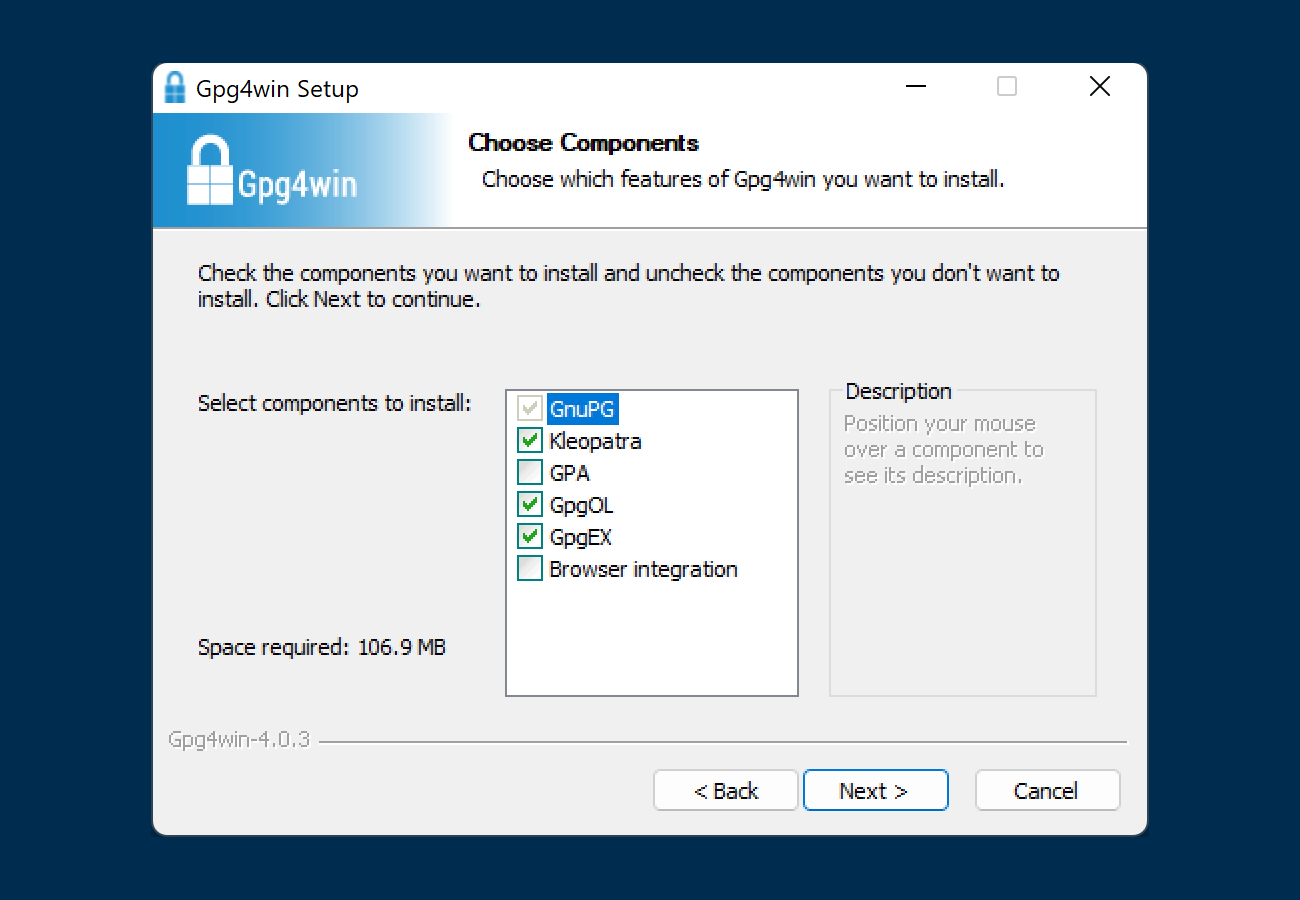
1. Installing Gpg4win
To kick things off, download and install Gpg4win from the official website.
By default, Gpg4win comes with a set of GPG command line tools and will install Kleopatra. Both will come in handy, as we will need them to create (or import) an OpenPGP key pair.
2. Generating a New GPG Key
If you're reading this, chances are you don't have a GPG key yet. Let's generate a new one for signing commits and tags.
We can do this "the easy way" (with Kleopatra, which presents a Graphical User Interface) or "the not-so-easy way" (by accessing the Command Line).
If you go with the latter, Windows Powershell (that comes with Windows) is all you'll need.
Option A: Kleopatra
After installing Gpg4win, Kleopatra should already be running. If not, you can launch it by visiting the Start menu.
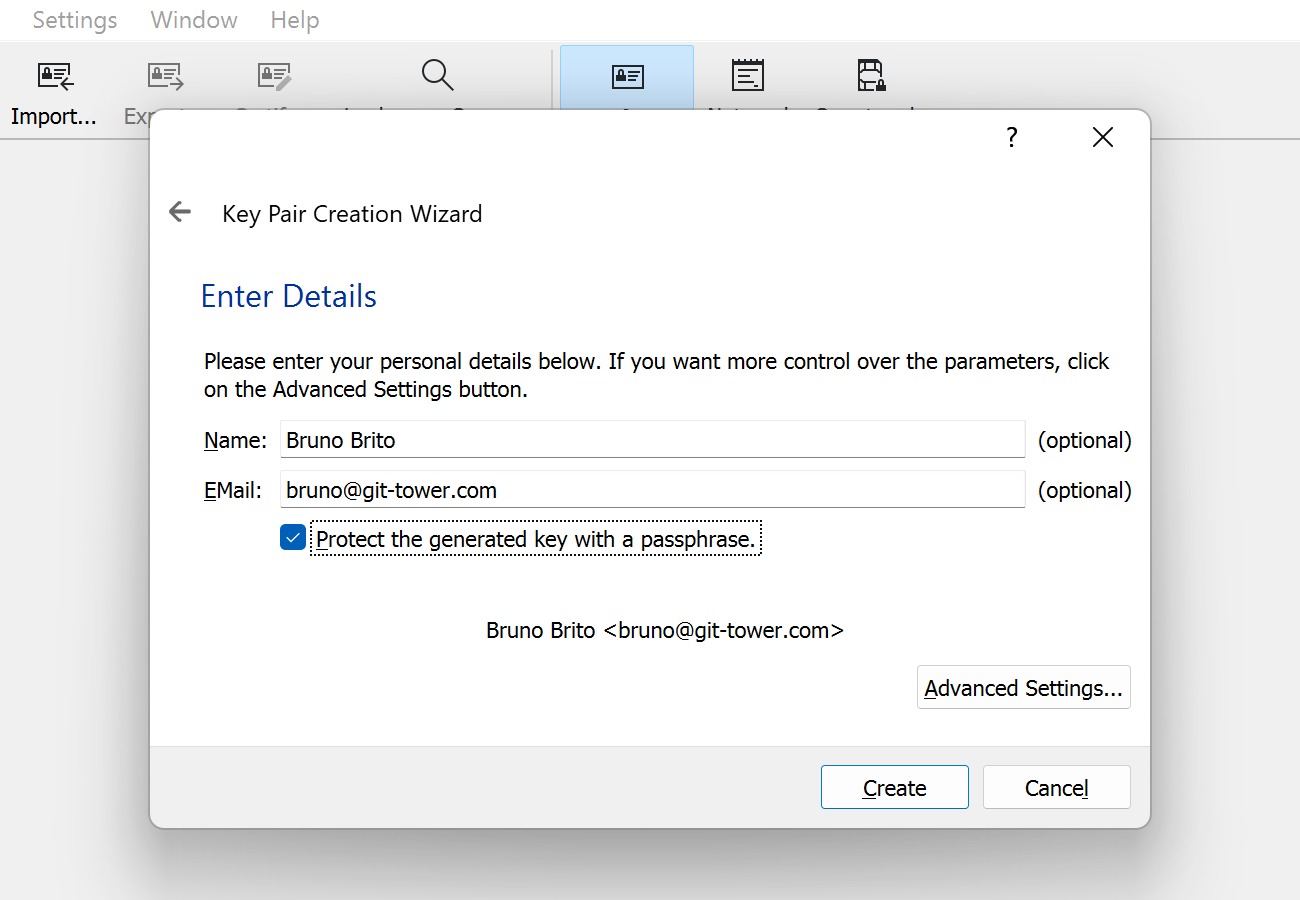
Let's click on "File > New Key Pair" and generate a new Open GPG key pair.
The first screen will ask you to enter your name and email address (it should match the one in your Git configuration and in your GitHub account).
We also advise you to tick the "Protect the generated key with a passphrase." box.
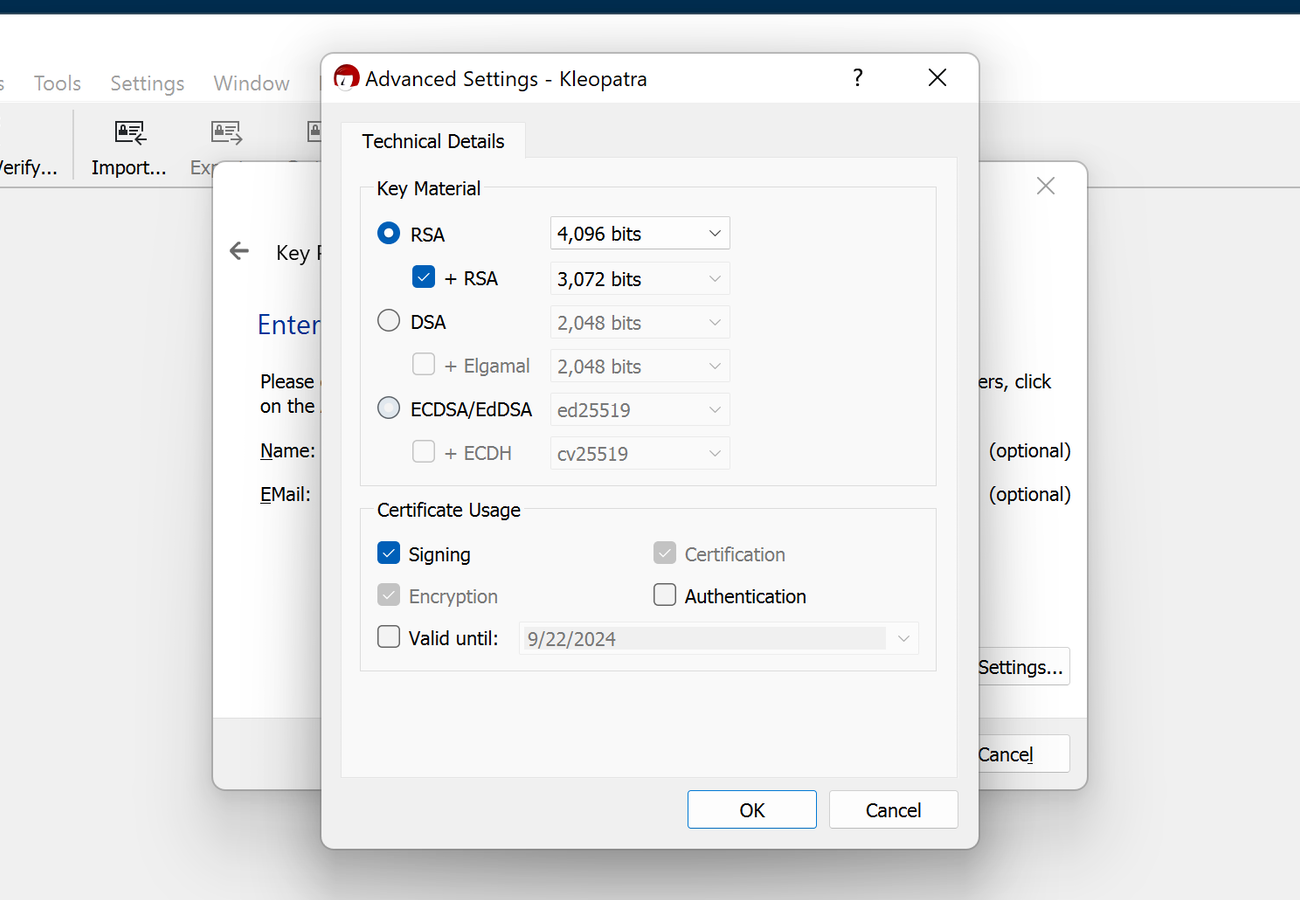
Before clicking "Create", click on "Advanced Settings" and choose a RSA key that is 4,096 bits long. In this example, we will also remove the expiration date.
We're done! That wasn't so hard, was it? 😎
Now would be a good time to create a backup of this key and store it somewhere safe. On to the next step!
Option B: Command Line
Fire up Windows Powershell and run the following command:
$ gpg --full-generate-keyWe will need to answer 3 questions. We suggest you create a RSA key that is 4,096 bits long (with no expiry date).
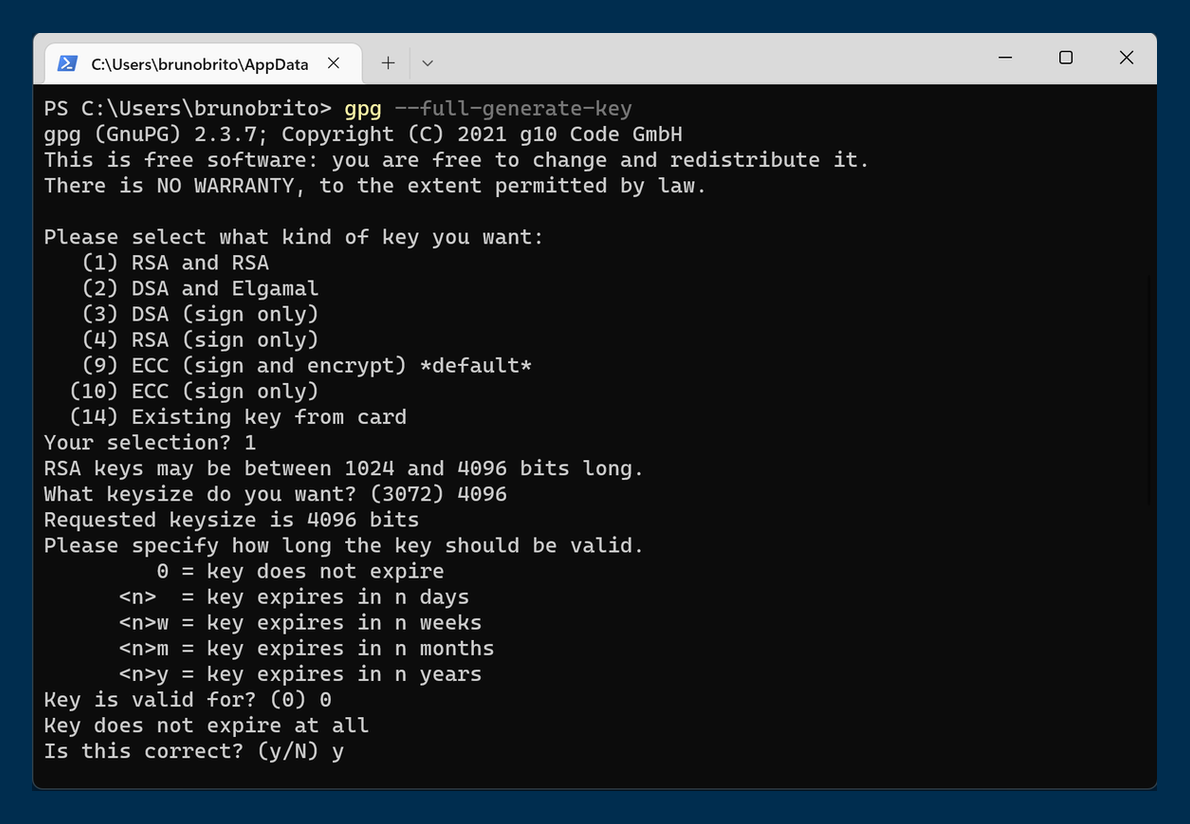
You will then be prompted to type your name and email address. As mentioned in option A, it should match the one in your Git configuration and in your GitHub account.
To finish things off, you will need to enter (and re-enter) a secure passphrase to protect the key you've just generated.
3. Getting GPG's Location
Congrats — you now have a GPG key! 🎉
Now we just need to tell Git where gpg.exe is located for things to work seamlessly. Following our method, it should be here:
C:\Program Files (x86)\GnuPG\bin\gpg.exe.
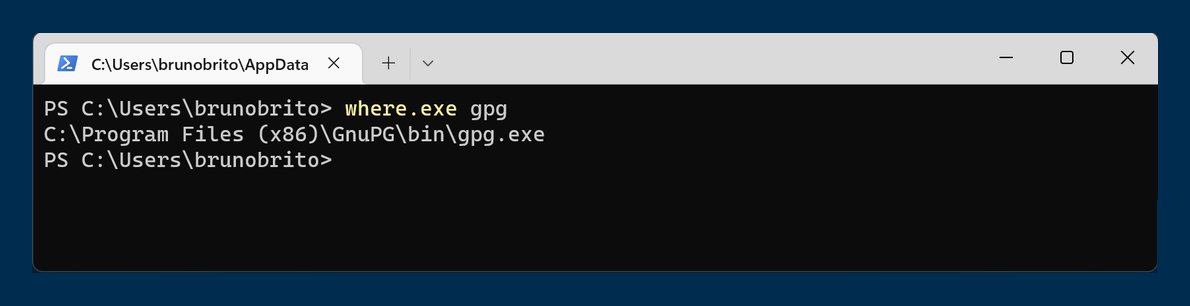
Just to be sure, type the following in Windows Powershell:
$ where.exe gpgCopy the output and move on to the next and final step!
4. Signing Commits in Git
To wrap things up, we will need to:
- Indicate where the GPG binary is located
- Select a Global GPG Key
Again, we can do this "the easy way" — with Tower, our easy to use Git client — or "the not-so-easy way", also known as the Command Line.
We make Tower, the best Git client.
Not a Tower user yet?
Download our 30-day free trial and experience a better way to work with Git!
Option A: Tower
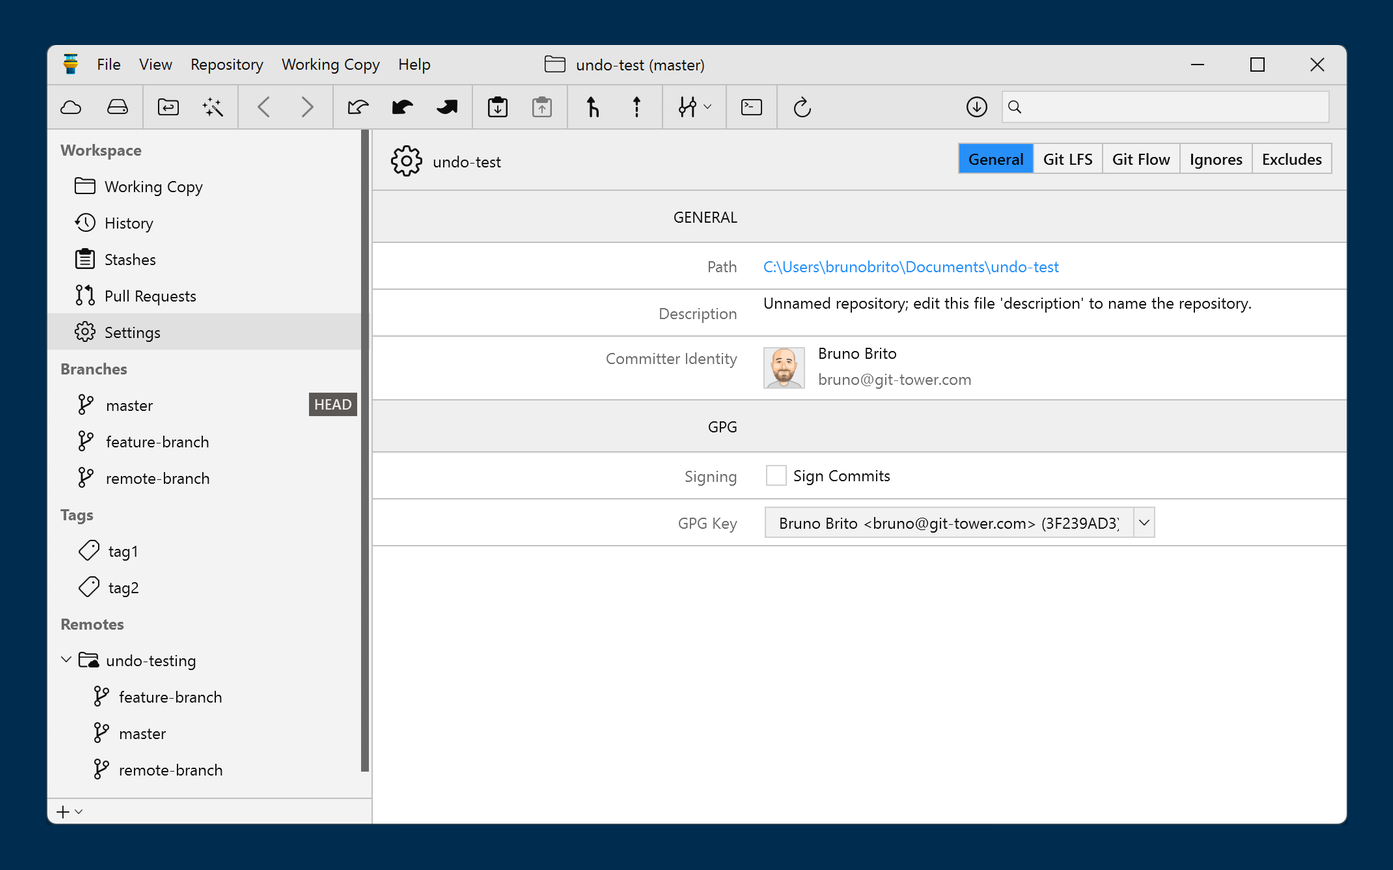
In Tower, setting this up is very straightforward. You'll just need to head over to the "Git Config" tab in the "Preferences" window and locate gpg.exe (as mentioned in the previous step).
You can then choose a GPG key by accessing the dropdown menu. Tick the "Sign Commits" box if you would like to sign every commit by default.

This will set it up globally (i.e., for every project) but you can also set it on a per-project basis by accessing the "Settings" view in the sidebar.
Signed commits are easy to tell apart, thanks to the green dot. Learn more about GPG Support in Tower for Windows here.
You're done! Happy committing! 🥳
Option B: Command Line
Back to Windows Powershell. Type the following command, where [PATH] is the output from the command you ran in step 3:
$ git config --global gpg.program [PATH]You can then set Git to sign all commits in a project by typing the following:
$ git config --local commit.gpgsign true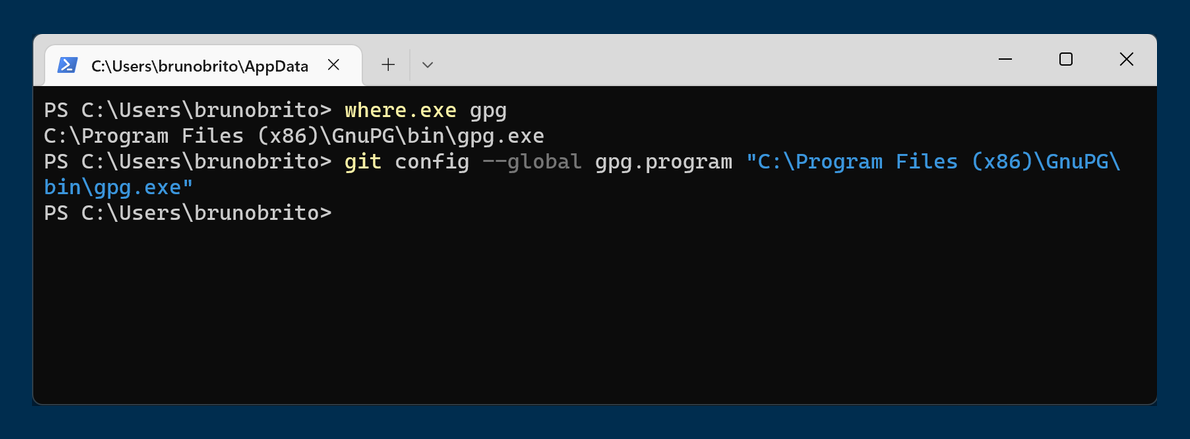
Two more commands to go! First, let's get the ID of the GPG key by typing:
$ gpg --list-secret-keys --keyid-format LONGThe ID should be located after 4096R/, as shown in the image below:
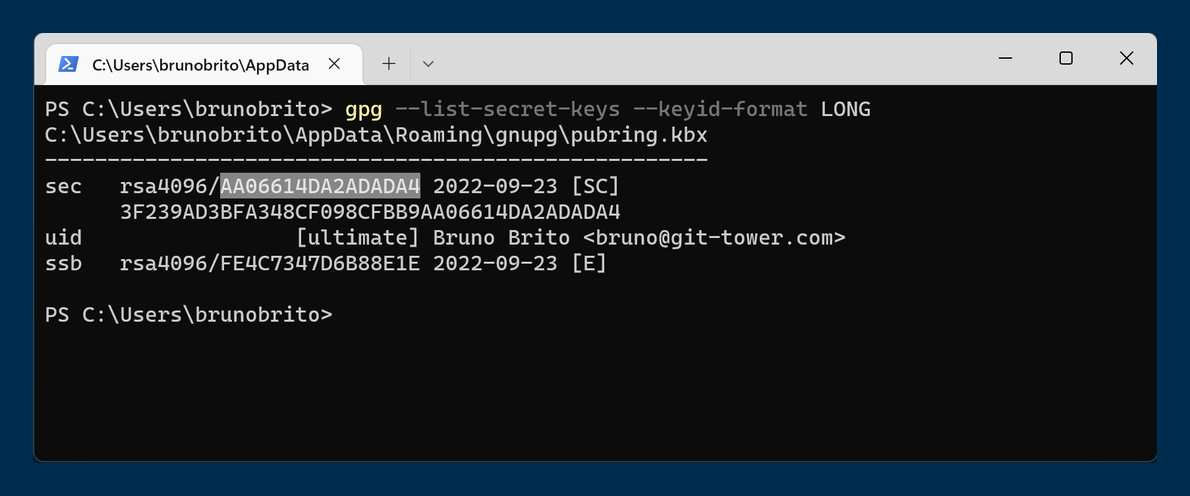
Finally, paste the ID at the end of this command:
$ git config --local user.signingkey "[GPG_KEY]"That's it! Now you can add commits as before — they will automatically be signed.
Final Words
We hope you found this guide useful. For more tips, sign up for our newsletter below and follow Tower on Twitter and LinkedIn! ✌️
Join Over 100,000 Developers & Designers
Be the first to know about new content from the Tower blog as well as giveaways and freebies via email.