
Building the Platform User Interface
First, we will build the user interface of the CuriousCat clone using HTML, CSS, and Bootstrap. To make things easy, we will use Flask-Bootstrap to integrate Bootstrap into our Flask application. Bootstrap is a free and open-source CSS framework directed at responsive, mobile-first front-end web development.
We are going to build nine (9) web pages for the CuriousCat clone. They are:
- Landing Page (Home Page)
- Authentication Pages (Login & Register Pages)
- User Dashboard
- User Profile Page
- User Questions Page
- Ask Question Page
- Reply Question Page
- View Question Page
Step 1: Installing Required Libraries
We will install the Flask and Flask-Bootstrap libraries so they can be used in the project later on. Both libraries are available on pip and can be installed with a single line in our terminal:
$ pip install flask
$ pip install flask-bootstrap4
Step 2: Designing the Landing Page
Create a file named app.py in the project folder then write the code that implements it. Save the code below in the app.py file:
from flask import *
from flask_bootstrap import Bootstrap
app = Flask(__name__)
Bootstrap(app)
@app.route("/")
def index():
return render_template("index.html")
if __name__ == "__main__":
app.run(debug=True)
Next, create a directory named templates and another named static in the project folder. These directories are used to store the assets of our web application (HTML files, images, etc).
After creating the directories, create a file named index.html inside the templates folder and save the code below in it:
{% extends "bootstrap/base.html" %}
{% block content %}
<div class="container">
<div class="row justify-content-center">
<div class="col-lg-12">
<div class="jumbotron text-center">
<h2>CuriousCat Clone with Python and Fauna</h2>
</div>
</div>
<div class="col-lg-8 text-center">
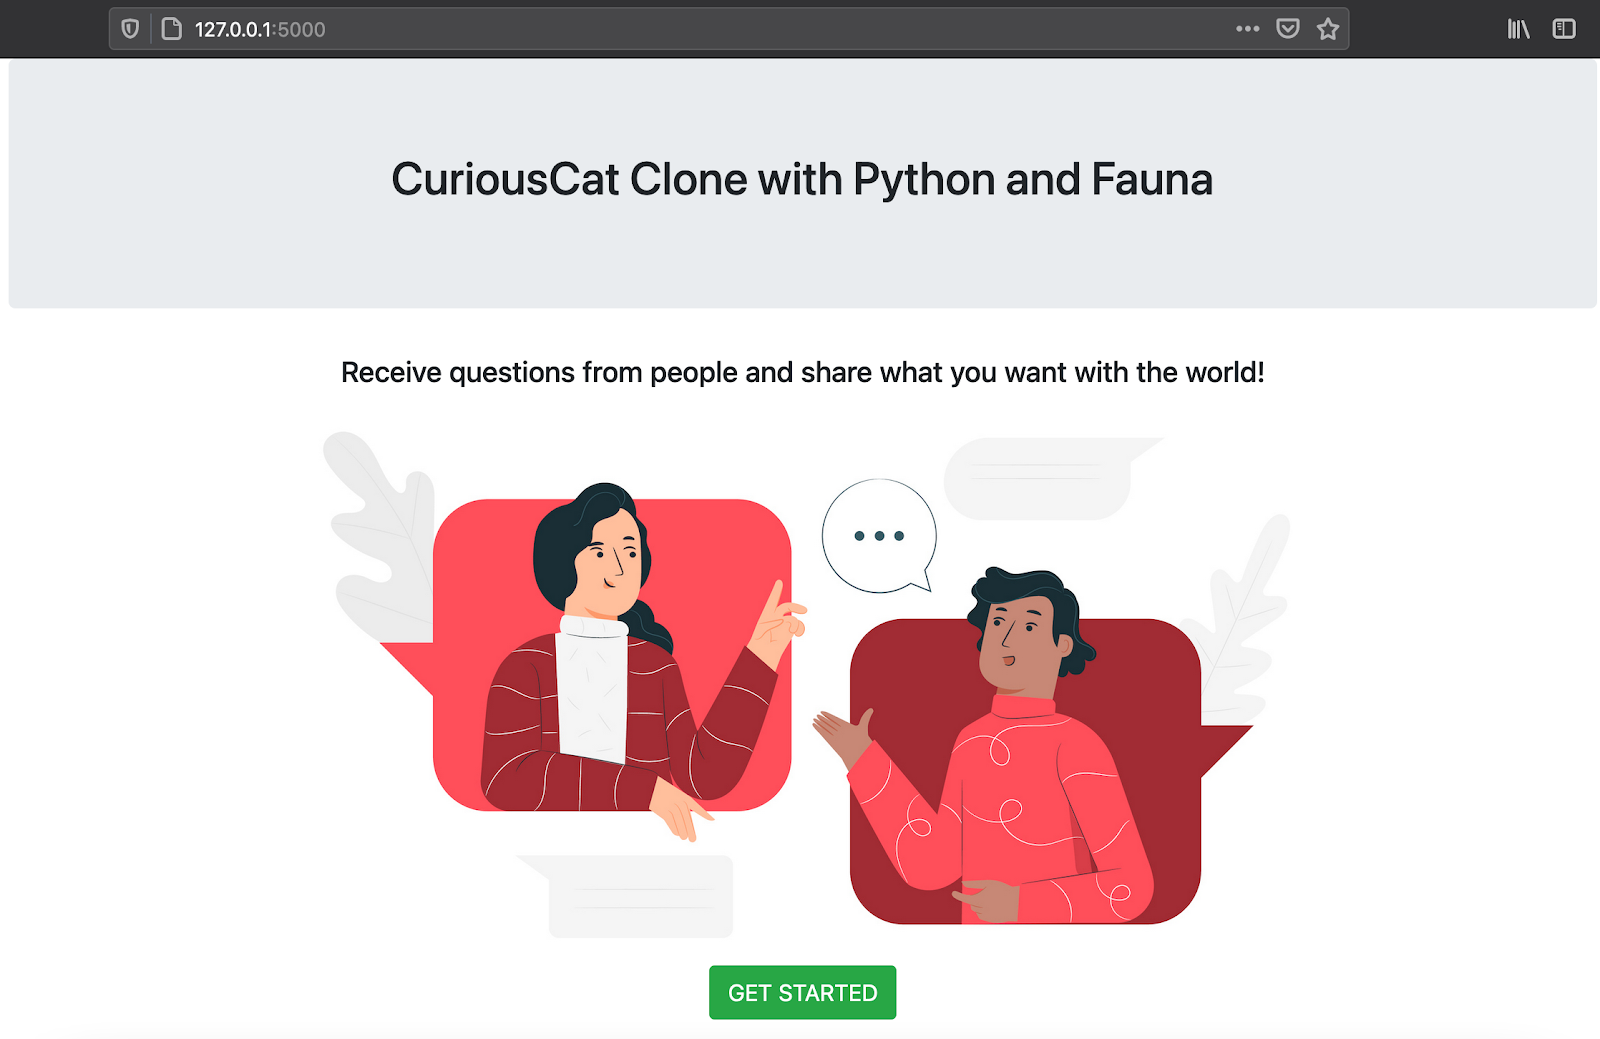
<h5>Receive questions from people and share what you want with the world!</h5>
<img width="100%" src="{{ url_for('static', filename='people-talking.jpg') }}">
<a href="#" class="btn btn-success">GET STARTED</a>
</div>
</div>
</div>
{% endblock %}
We referenced an image in our HTML file above. You can download it here, and store it in the static directory. Our project structure should resemble the image below:
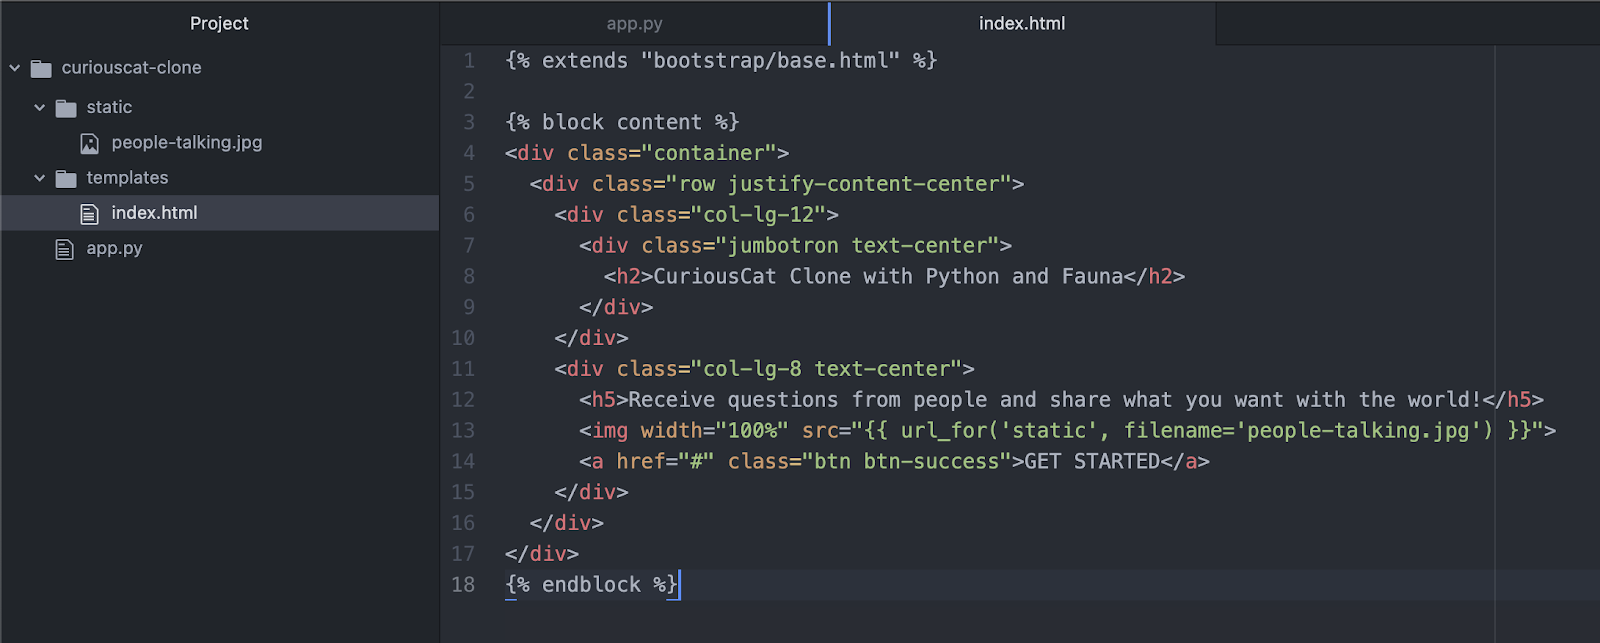
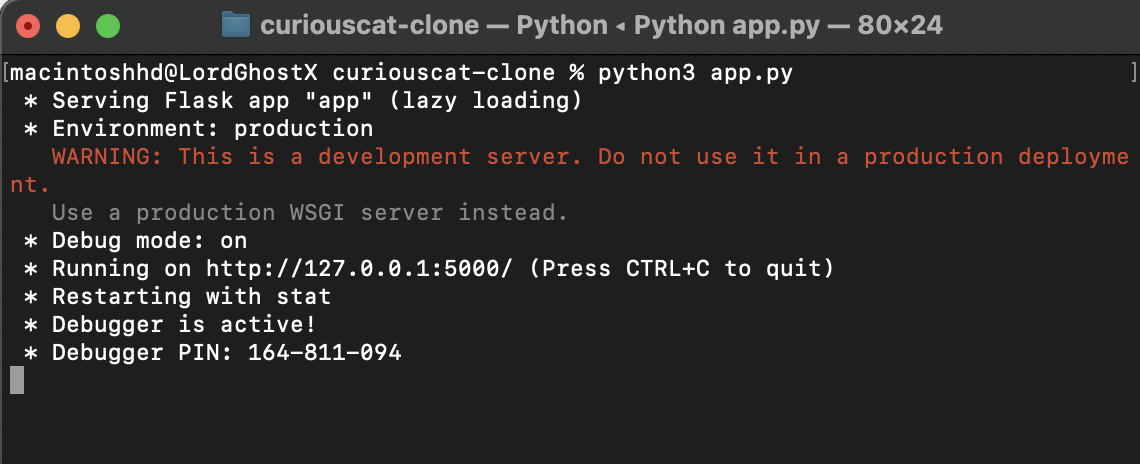
When we run our app.py file we should get a response quite like the image below in our terminal and browser:
Step 3: Designing the Authentication Pages
Update the app.py file with the code below to add the route responsible for rendering and handling the registration and authentication of users on our platform.
@app.route("/register/", methods=["GET", "POST"])
def register():
return render_template("register.html")
@app.route("/login/", methods=["GET", "POST"])
def login():
return render_template("login.html")
Now, we will create a file named register.html in our templates directory and store the code below in it:
<div class="container">
<div class="row justify-content-center">
<div class="col-lg-12">
<div class="jumbotron text-center p-4">
<h2>CuriousCat Clone with Python and Fauna</h2>
<h5>Create an account to get started!</h5>
</div>
</div>
<div class="col-lg-6">
<form method="POST">
{% with messages = get_flashed_messages(with_categories=true) %}
{% if messages %}
{% for category, message in messages %}
<p class="text-{{ category }}">{{ message }}</p>
{% endfor %}
{% endif %}
{% endwith %}
<div class="form-group">
<label for="username">Username</label>
<input type="text" class="form-control" id="username" name="username" placeholder="Choose Username" required>
</div>
<div class="form-group">
<label for="password">Password</label>
<input type="password" class="form-control" id="password" name="password" placeholder="Choose Password" required>
</div>
<div class="text-center">
<button type="submit" class="btn btn-success">Create Account</button>
<a href="{{ url_for('login') }}"><small class="form-text">Already have an account? Login</small></a>
</div>
</form>
</div>
</div>
</div>
{% endblock %}
After that, we will create a file named login.html in our templates directory and store the code below in it:
{% extends "bootstrap/base.html" %}
{% block content %}
<div class="container">
<div class="row justify-content-center">
<div class="col-lg-12">
<div class="jumbotron text-center p-4">
<h2>CuriousCat Clone with Python and Fauna</h2>
<h5>Login to access your account!</h5>
</div>
</div>
<div class="col-lg-6">
<form method="POST">
{% with messages = get_flashed_messages(with_categories=true) %}
{% if messages %}
{% for category, message in messages %}
<p class="text-{{ category }}">{{ message }}</p>
{% endfor %}
{% endif %}
{% endwith %}
<div class="form-group">
<label for="username">Username</label>
<input type="text" class="form-control" id="username" name="username" placeholder="Enter Username" required>
</div>
<div class="form-group">
<label for="password">Password</label>
<input type="password" class="form-control" id="password" name="password" placeholder="Enter Password" required>
</div>
<div class="text-center">
<button type="submit" class="btn btn-success">Access Account</button>
<a href="{{ url_for('register') }}"><small class="form-text">Don't have an account? Register</small></a>
</div>
</form>
</div>
</div>
</div>
{% endblock %}
Update the href attribute of the GET STARTED button in the index.html file to redirect to the registration page when clicked.
<a href="{{ url_for('register') }}" class="btn btn-success">GET STARTED</a>
Step 4: Designing the User Dashboard Page
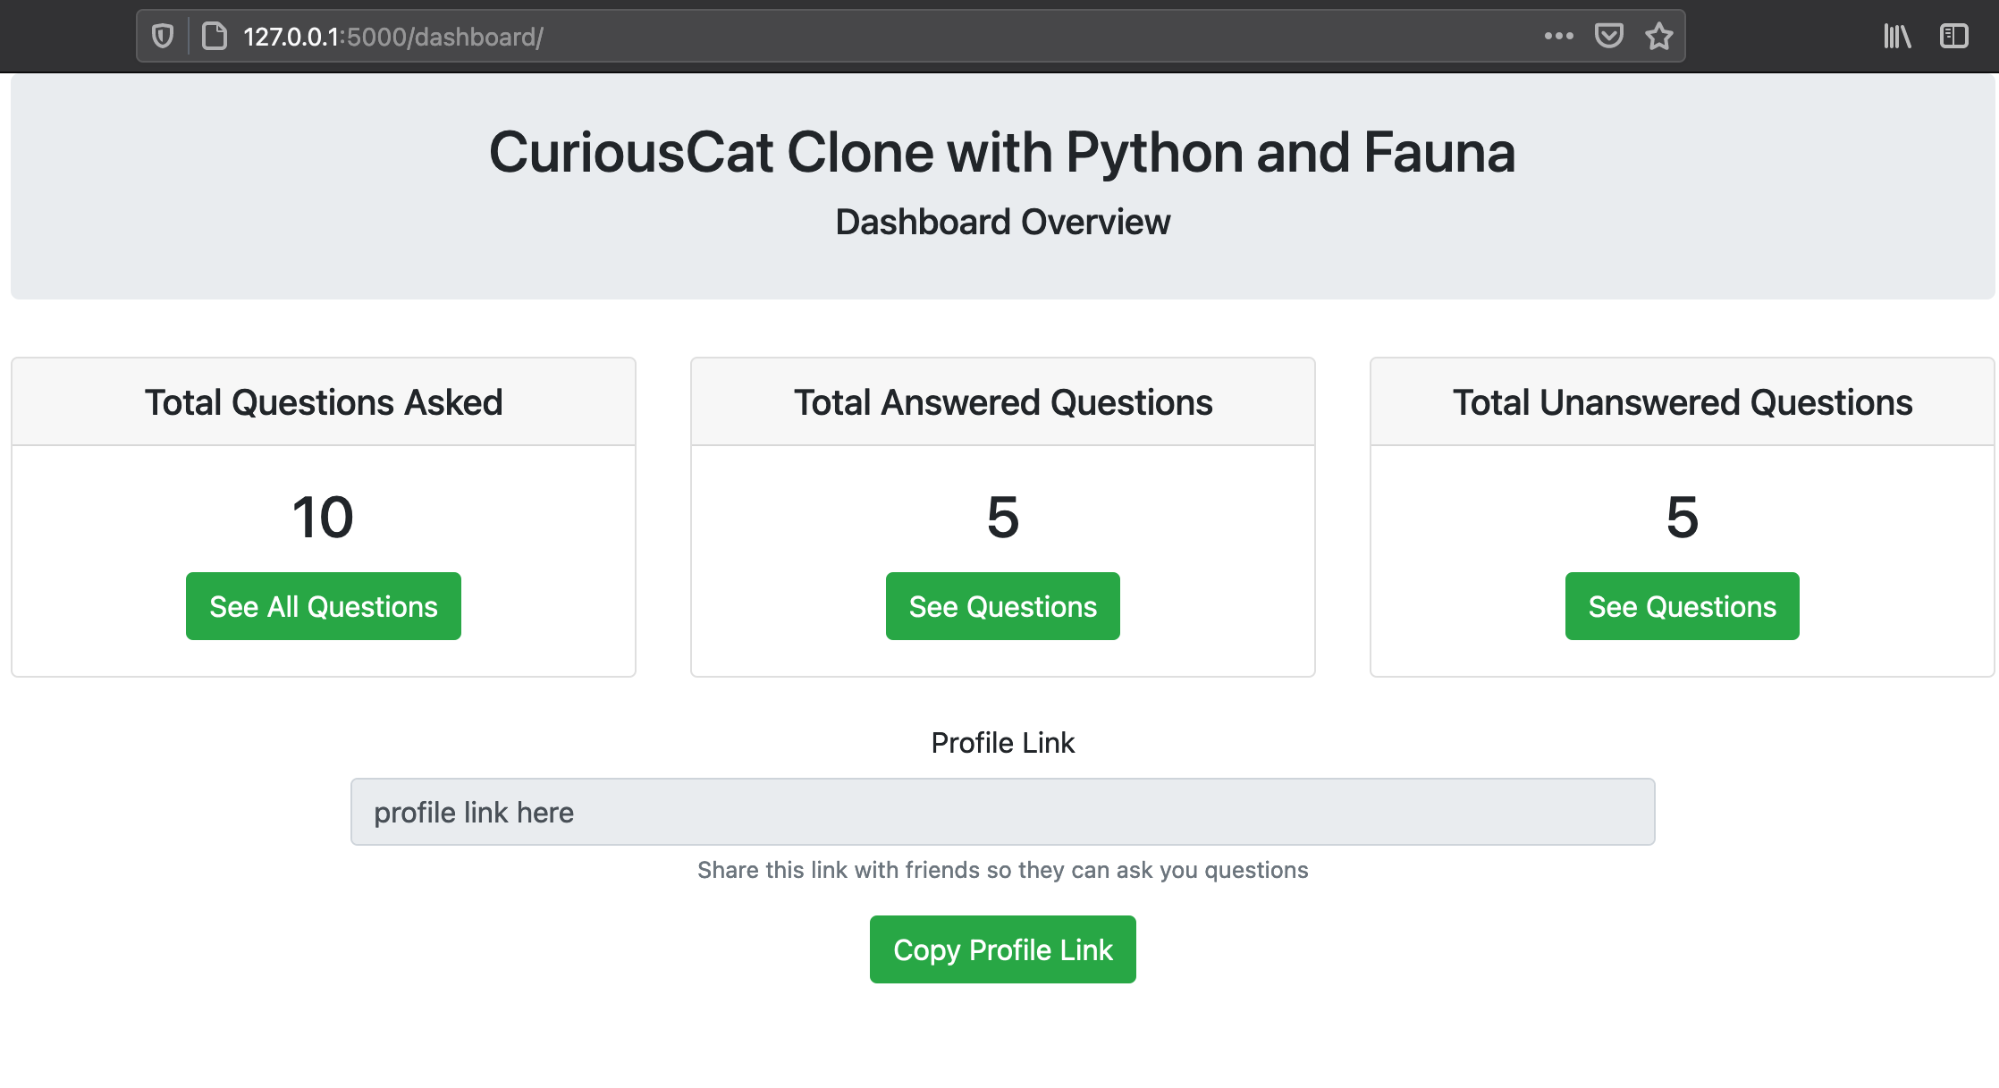
Update the app.py file with the code below to add the route responsible for displaying the dashboard of users on our platform. Our dashboard will display question statistics for our users, as well as provide links to pages for questions to be viewed and responded to.
@app.route("/dashboard/")
def dashboard():
return render_template("dashboard.html")
Now, we will create a file named register.html in our templates directory and store the code below in it:
{% extends "bootstrap/base.html" %}
{% block content %}
<div class="container">
<div class="row justify-content-center">
<div class="col-lg-12">
<div class="jumbotron text-center p-4">
<h2>CuriousCat Clone with Python and Fauna</h2>
<h5>Dashboard Overview</h5>
</div>
</div>
<div class="col-lg-4">
<div class="card text-center">
<h5 class="card-header">Total Questions Asked</h5>
<div class="card-body">
<h2 class="card-title">10</h2>
<a href="#" class="btn btn-success">See All Questions</a>
</div>
</div>
</div>
<div class="col-lg-4">
<div class="card text-center">
<h5 class="card-header">Total Answered Questions</h5>
<div class="card-body">
<h2 class="card-title">5</h2>
<a href="#" class="btn btn-success">See Questions</a>
</div>
</div>
</div>
<div class="col-lg-4">
<div class="card text-center">
<h5 class="card-header">Total Unanswered Questions</h5>
<div class="card-body">
<h2 class="card-title">5</h2>
<a href="#" class="btn btn-success">See Questions</a>
</div>
</div>
</div>
<div class="col-lg-8 mt-4">
<form class="text-center">
<div class="form-group">
<label>Profile Link</label>
<input type="text" id="profileLink" class="form-control" value="#" readonly>
<small class="form-text text-muted">Share this link with friends so they can ask you questions</small>
</div>
<button type="button" class="btn btn-success mb-5" onclick="copyProfileLink()">Copy Profile Link</button>
</form>
</div>
</div>
</div>
<script>
function copyProfileLink() {
/* Get the text field */
var copyText = document.getElementById("profileLink");
/* Select the text field */
copyText.select();
copyText.setSelectionRange(0, 99999); /*For mobile devices*/
/* Copy the text inside the text field */
document.execCommand("copy");
alert("Successfully copied profile link to clipboard!");
}
</script>
{% endblock %}
When we run our app.py file we should get a response similar to the image below in our browser:
Step 5: Designing the User Profile Page
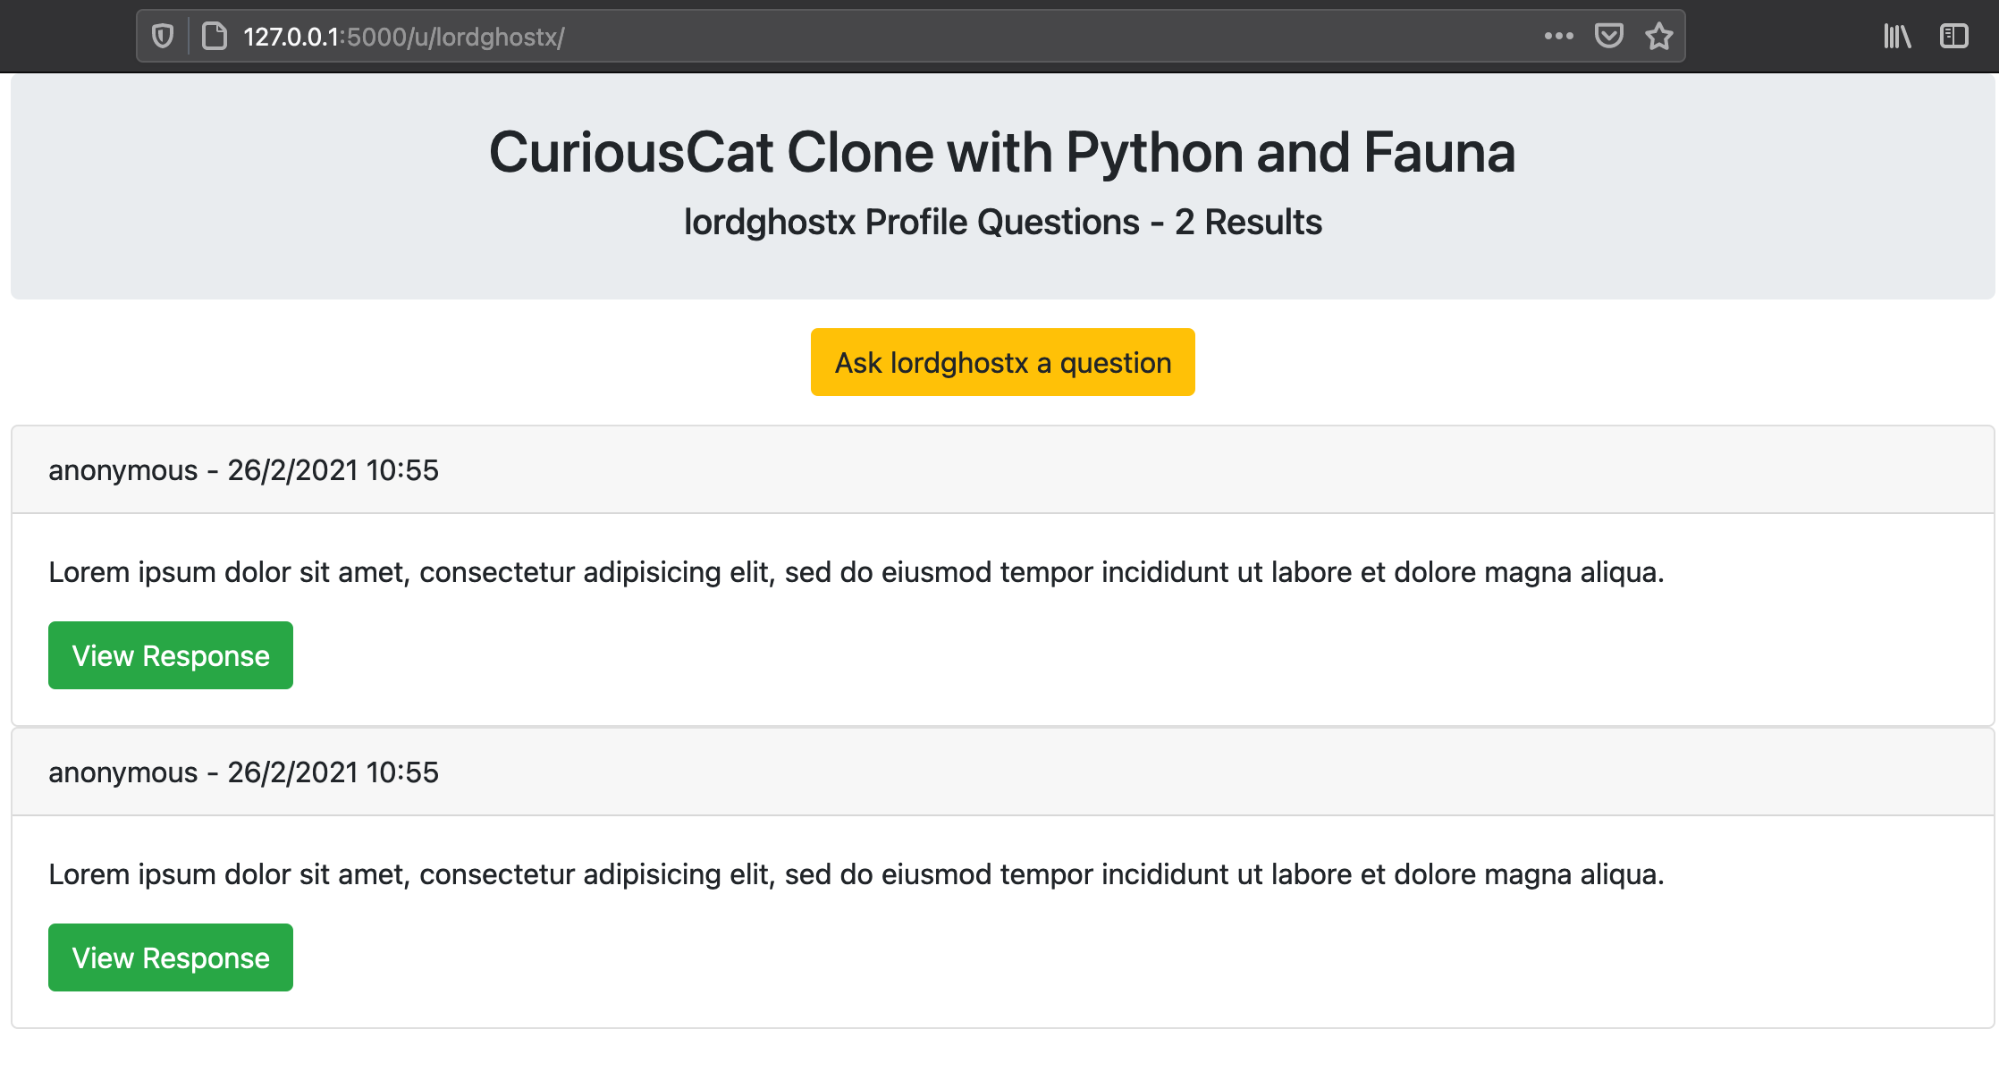
Now, update the app.py file with the code below to add the route responsible for displaying the profile of users on our platform. The profile of users on our platform shows questions the current user has responded to, as well as links to pages to ask the user a question.
@app.route("/u/<string:username>/")
def view_profile(username):
return render_template("view-profile.html", username=username)
Next, we will create a file named view-profile.html in our templates directory and store the code below in it:
{% extends "bootstrap/base.html" %}
{% block content %}
<div class="container">
<div class="row justify-content-center">
<div class="col-lg-12">
<div class="jumbotron text-center p-4" style="margin-bottom: 0px">
<h2>CuriousCat Clone with Python and Fauna</h2>
<h5>{{ username }} Profile Questions - 2 Results</h5>
</div>
</div>
<a href="#"><button type="button" class="btn btn-warning m-3">Ask {{ username }} a question</button></a>
<div class="col-lg-12">
<div class="card">
<div class="card-header">
anonymous - 26/2/2021 10:55
</div>
<div class="card-body">
<p class="card-text">Lorem ipsum dolor sit amet, consectetur adipisicing elit, sed do eiusmod tempor incididunt ut labore et dolore magna aliqua.</p>
<a href="#" class="btn btn-success">View Response</a>
</div>
</div>
</div>
</div>
</div>
{% endblock %}
When we run our app.py file we should get a response quite like the image below in our browser:
Step 6: Designing the User Questions Page
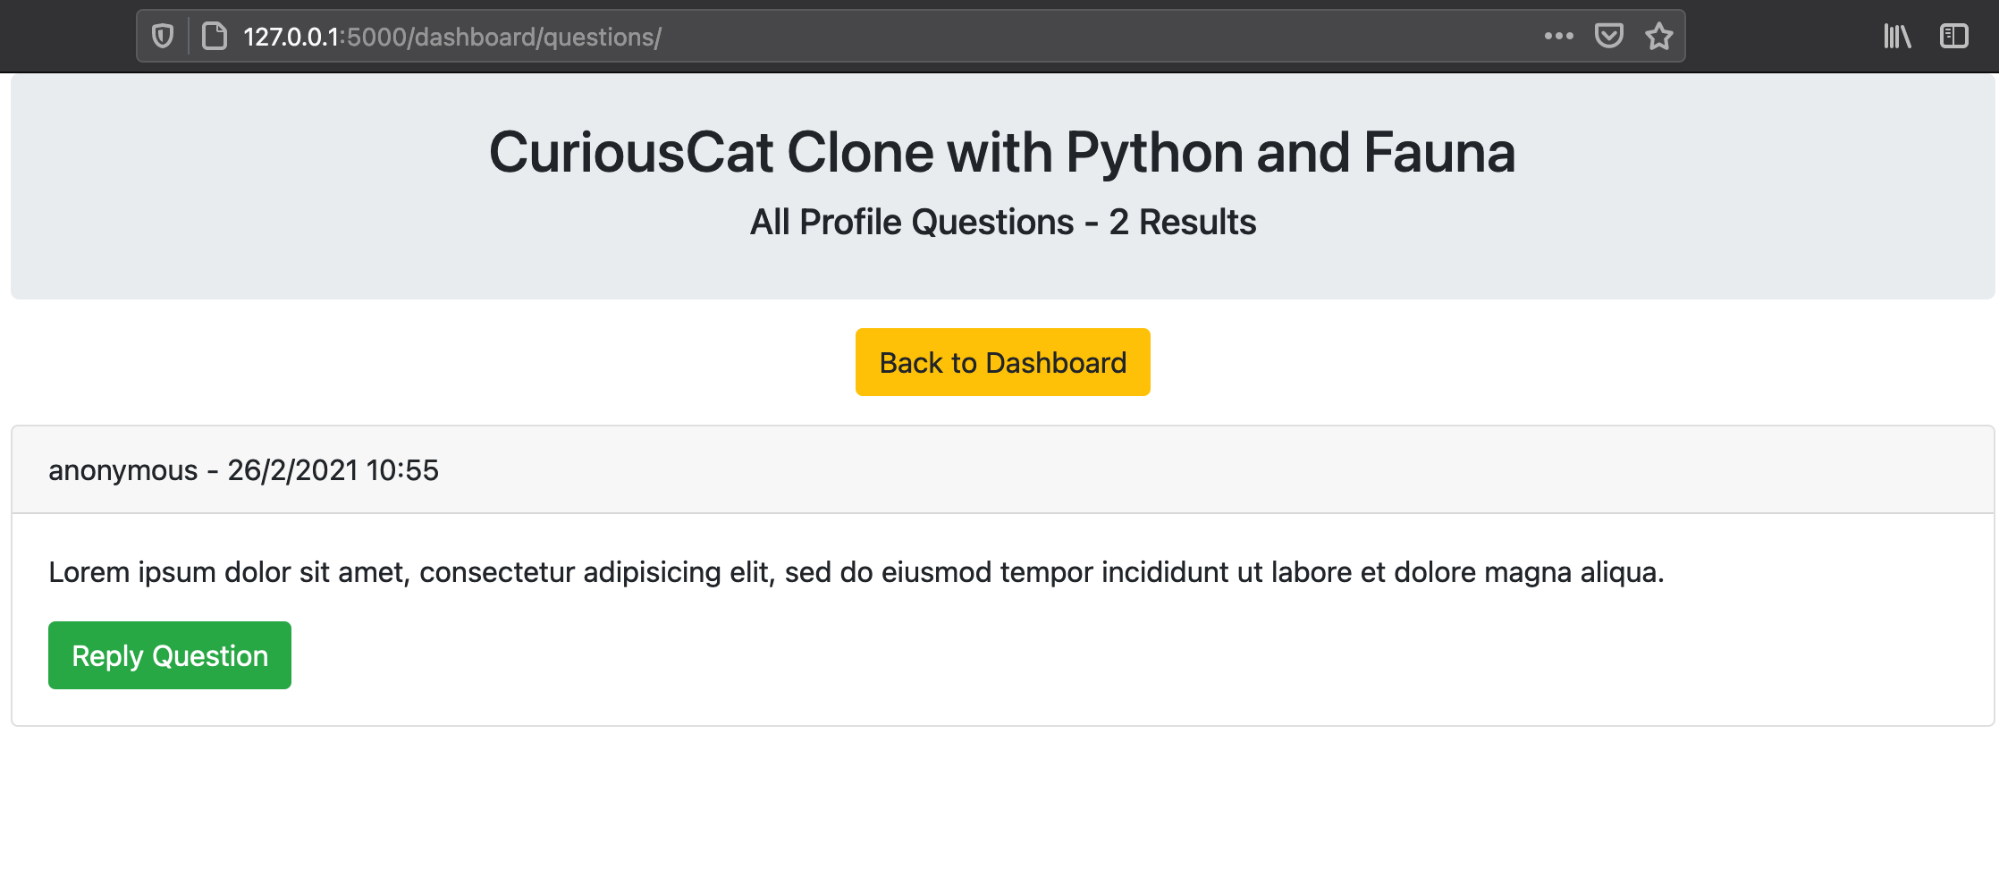
Update the app.py file with the code below to add the route responsible for displaying the questions users have been asked.
@app.route("/dashboard/questions/")
def questions():
question_type = request.args.get("type", "all").lower()
return render_template("questions.html")
We will now create a file named questions.html in our templates directory and store the code below in it:
{% extends "bootstrap/base.html" %}
{% block content %}
<div class="container">
<div class="row justify-content-center">
<div class="col-lg-12">
<div class="jumbotron text-center p-4" style="margin-bottom: 0px">
<h2>CuriousCat Clone with Python and Fauna</h2>
<h5>{{ request.args.get("type", "all")|capitalize }} Profile Questions - 2 Results</h5>
</div>
</div>
<a href="{{ url_for('dashboard') }}"><button type="button" class="btn btn-warning m-3">Back to Dashboard</button></a>
<div class="col-lg-12">
<div class="card">
<div class="card-header">
anonymous - 26/2/2021 10:55
</div>
<div class="card-body">
<p class="card-text">Lorem ipsum dolor sit amet, consectetur adipisicing elit, sed do eiusmod tempor incididunt ut labore et dolore magna aliqua.</p>
<a href="#" class="btn btn-success">
Reply Question
</a>
</div>
</div>
</div>
</div>
</div>
{% endblock %}
When we run our app.py file we should get a response similar to the image below in our browser:
Update the href attributes of the See Questions buttons in the dashboard.html file to redirect to the questions page when clicked.
<div class="col-lg-4">
<div class="card text-center">
<h5 class="card-header">Total Questions Asked</h5>
<div class="card-body">
<h2 class="card-title">10</h2>
<a href="{{ url_for('questions') }}" class="btn btn-success">See All Questions</a>
</div>
</div>
</div>
<div class="col-lg-4">
<div class="card text-center">
<h5 class="card-header">Total Answered Questions</h5>
<div class="card-body">
<h2 class="card-title">5</h2>
<a href="{{ url_for('questions') }}?type=answered" class="btn btn-success">See Questions</a>
</div>
</div>
</div>
<div class="col-lg-4">
<div class="card text-center">
<h5 class="card-header">Total Unanswered Questions</h5>
<div class="card-body">
<h2 class="card-title">5</h2>
<a href="{{ url_for('questions') }}?type=unanswered" class="btn btn-success">See Questions</a>
</div>
</div>
</div>
Step 7: Designing the Ask Questions Page
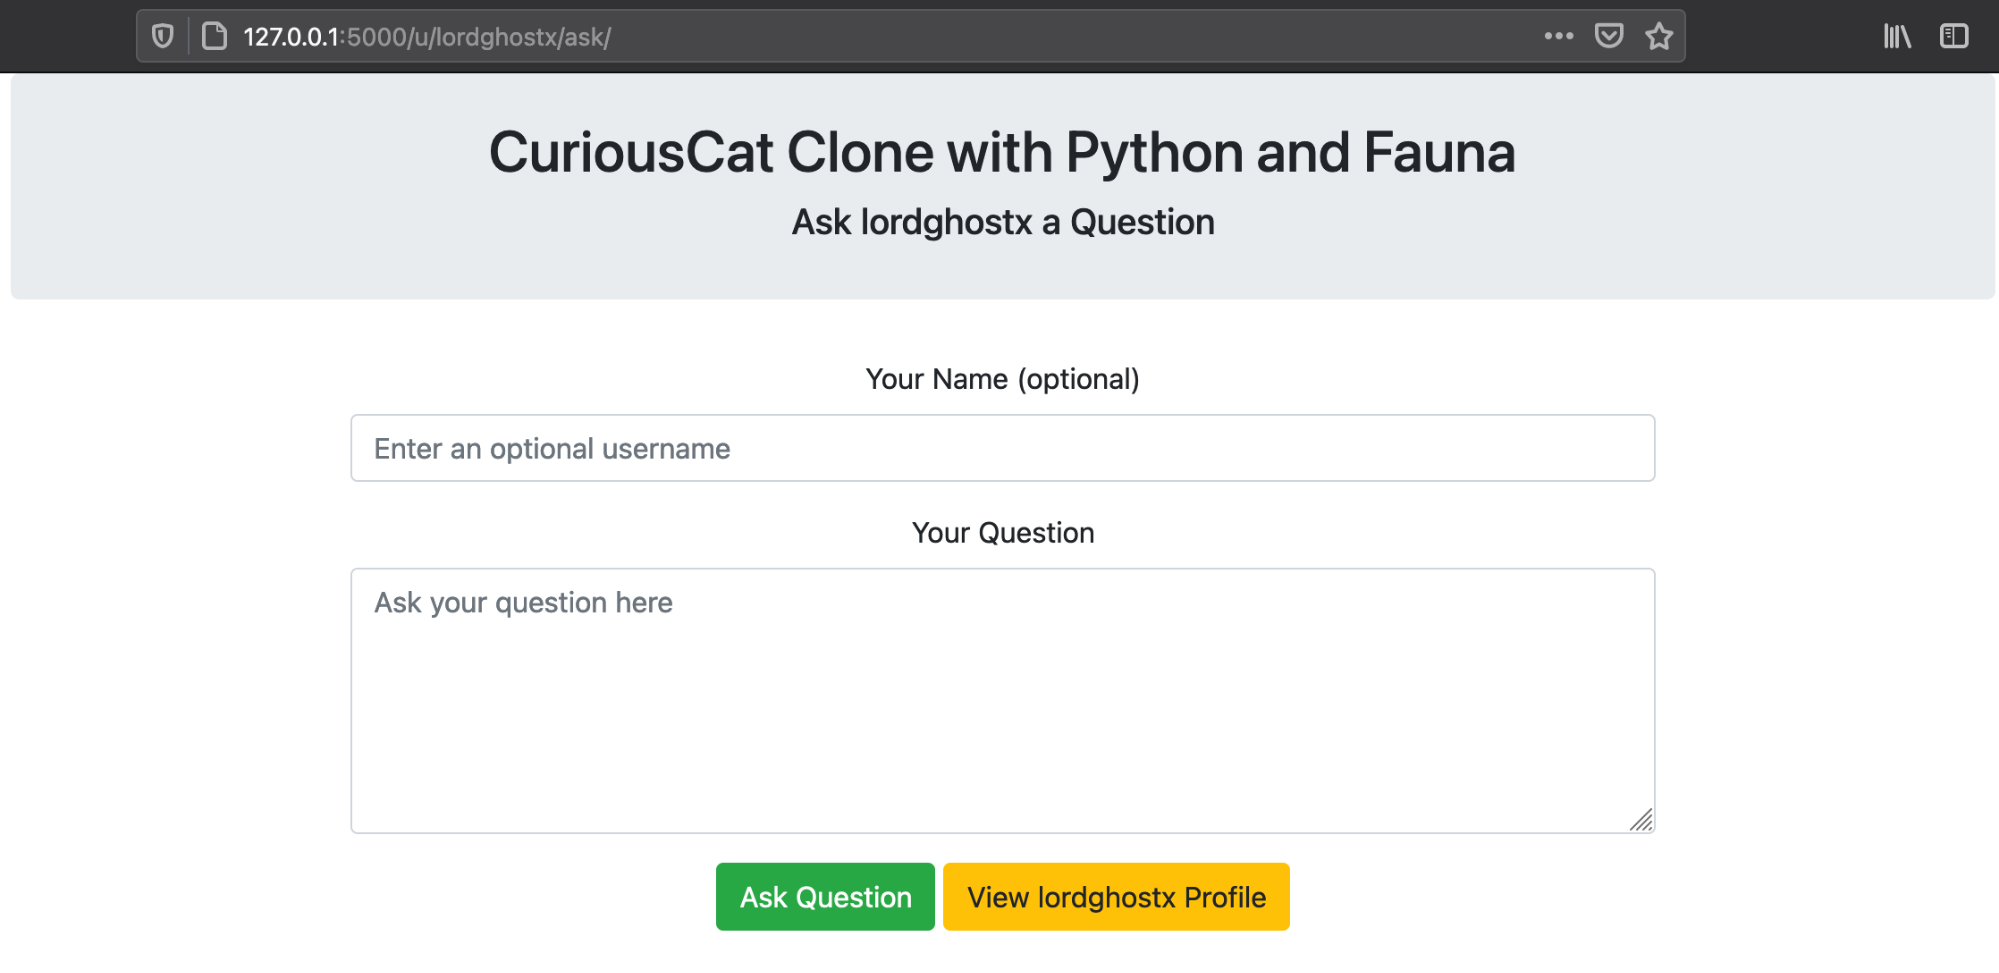
Update the app.py file with the code below to add the route responsible for rendering the page where questions can be submitted to users on our platform.
@app.route("/u/<string:username>/ask/", methods=["GET", "POST"])
def ask_question(username):
return render_template("ask-question.html", username=username)
Next, we will create a file named ask-question.html in our templates directory and store the code below in it:
{% extends "bootstrap/base.html" %}
{% block content %}
<div class="container">
<div class="row justify-content-center">
<div class="col-lg-12">
<div class="jumbotron text-center p-4">
<h2>CuriousCat Clone with Python and Fauna</h2>
<h5>Ask {{ username }} a Question</h5>
</div>
</div>
<div class="col-lg-8">
<form method="POST" class="text-center">
{% with messages = get_flashed_messages(with_categories=true) %}
{% if messages %}
{% for category, message in messages %}
<p class="text-{{ category }}">{{ message }}</p>
{% endfor %}
{% endif %}
{% endwith %}
<div class="form-group">
<label>Your Name (optional)</label>
<input type="text" class="form-control" name="user_asking" placeholder="Enter an optional username">
</div>
<div class="form-group">
<label>Your Question</label>
<textarea class="form-control" rows="5" name="question" placeholder="Ask your question here" required></textarea>
</div>
<button type="submit" class="btn btn-success">Ask Question</button>
<a href="{{ url_for('view_profile', username=username) }}"><button type="button" class="btn btn-warning">View {{ username }} Profile</button></a>
</form>
</div>
</div>
</div>
{% endblock %}
When we run our app.py file we should get a response quite like the image below in our browser:
Update the href attribute of the Ask User Question button in the view-profile.html file to redirect to the ask question page when clicked.
<a href="{{ url_for('ask_question', username=username) }}"><button type="button" class="btn btn-warning m-3">Ask {{ username }} a question</button></a>
Step 8: Designing the Reply Question Page
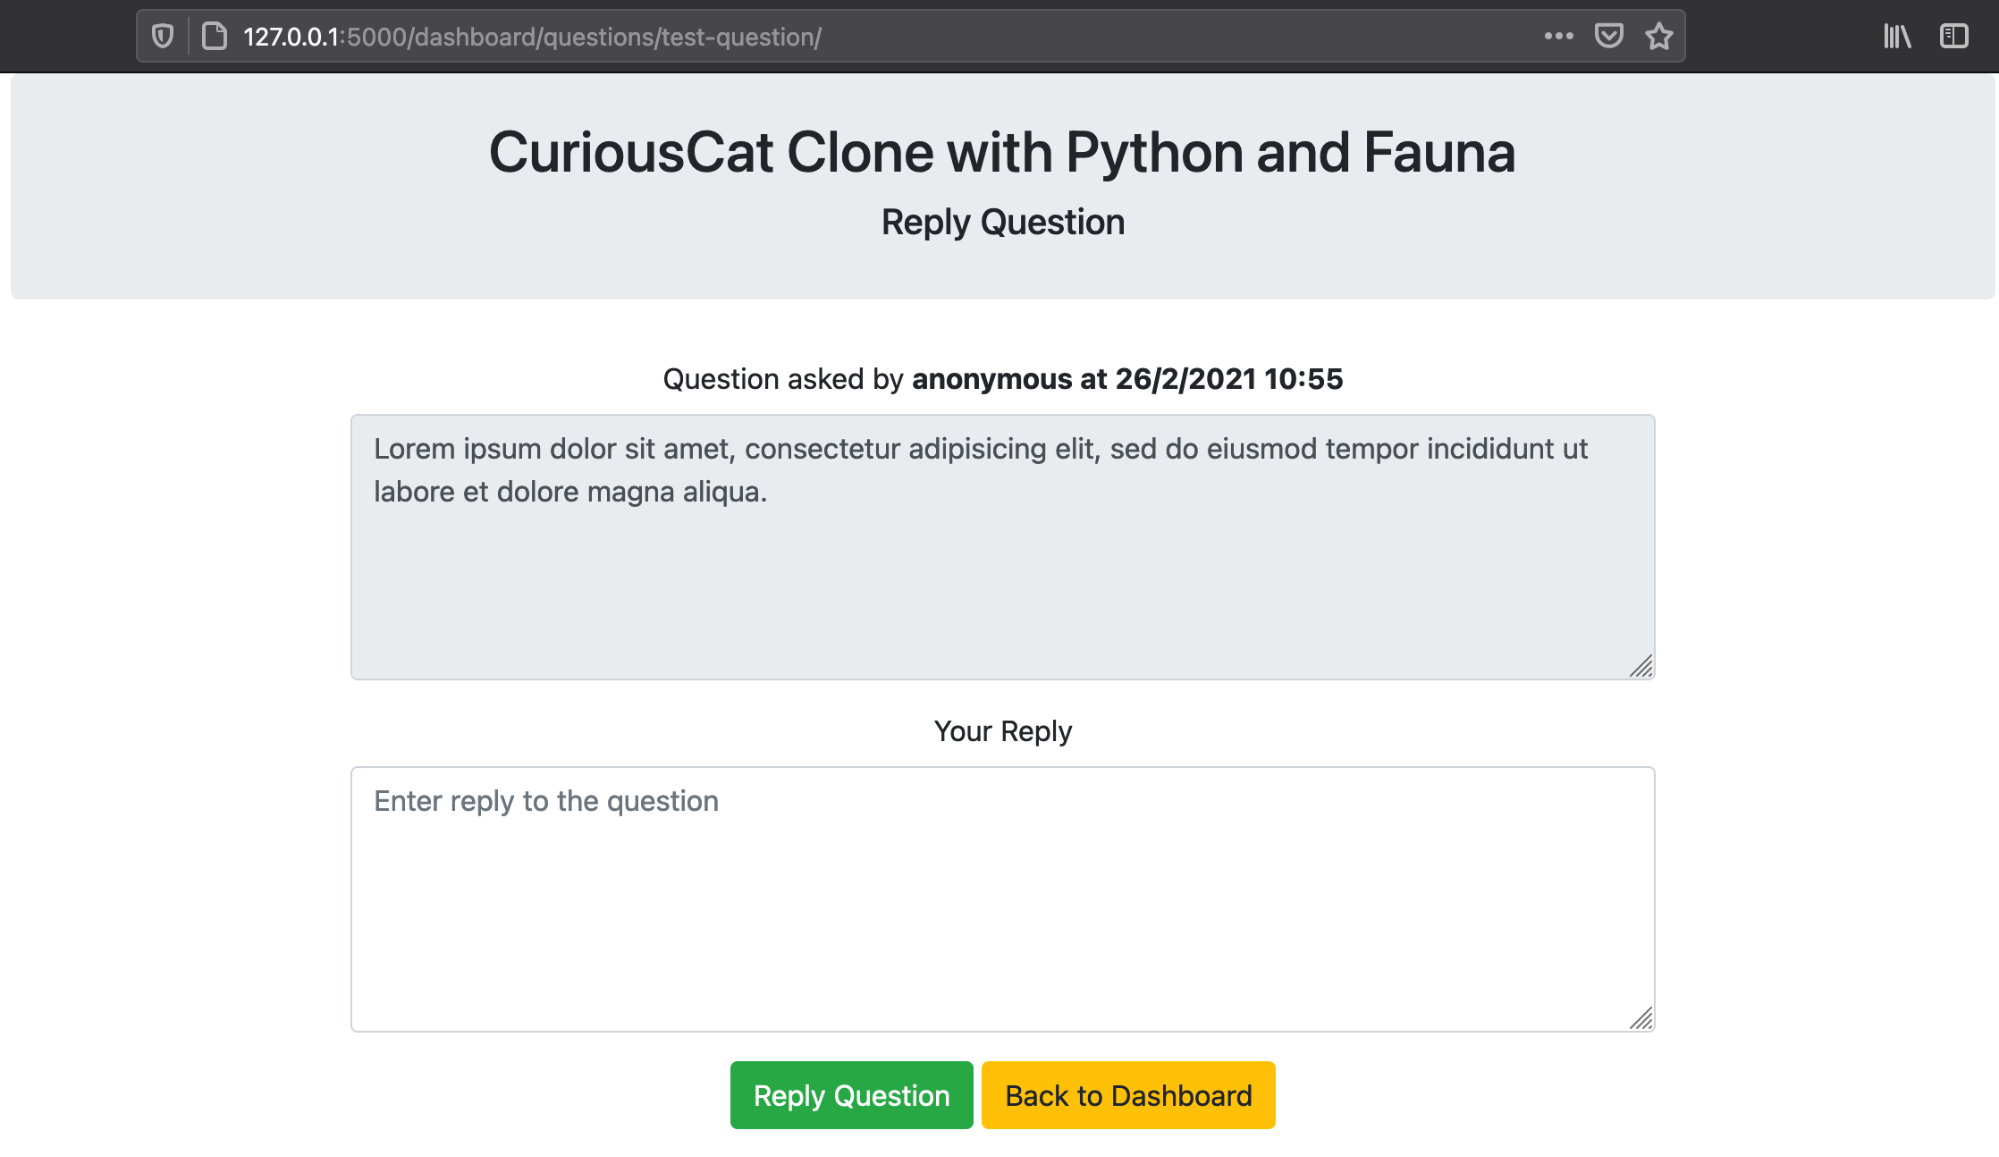
Update the app.py file with the code below to add the route responsible for rendering the page where users can reply to questions they have been asked.
@app.route("/dashboard/questions/<string:question_id>/", methods=["GET", "POST"])
def reply_question(question_id):
return render_template("reply-question.html")
After that, we will create a file named reply-question.html in our templates directory and store the code below in it:
{% extends "bootstrap/base.html" %}
{% block content %}
<div class="container">
<div class="row justify-content-center">
<div class="col-lg-12">
<div class="jumbotron text-center p-4">
<h2>CuriousCat Clone with Python and Fauna</h2>
<h5>Reply Question</h5>
</div>
</div>
<div class="col-lg-8">
<form method="POST" class="text-center">
<div class="form-group">
<label>Question asked by <strong>anonymous at 26/2/2021 10:55</strong></label>
<textarea class="form-control" rows="5" readonly>Lorem ipsum dolor sit amet, consectetur adipisicing elit, sed do eiusmod tempor incididunt ut labore et dolore magna aliqua.</textarea>
</div>
<div class="form-group">
<label>Your Reply</label>
<textarea class="form-control" rows="5" name="reply" placeholder="Enter reply to the question" required></textarea>
</div>
<button type="submit" class="btn btn-success">
Reply Question
</button>
<a href="{{ url_for('dashboard') }}"><button type="button" class="btn btn-warning">Back to Dashboard</button></a>
</form>
</div>
</div>
</div>
{% endblock %}
When we run our app.py file we should get a response like the one in the image below, in our browser:
Step 9: Designing the View Question Page
We now update the app.py file with the code below to add the route responsible for rendering the page where users can view questions and their replies on other users’ profiles.
@app.route("/q/<string:question_id>/", methods=["GET", "POST"])
def view_question(question_id):
return render_template("view-question.html")
Afterwards, we will create a file named view-question.html in our templates directory and store the code below in it:
{% extends "bootstrap/base.html" %}
{% block content %}
<div class="container">
<div class="row justify-content-center">
<div class="col-lg-12">
<div class="jumbotron text-center p-4">
<h2>CuriousCat Clone with Python and Fauna</h2>
<h5>Viewing Question for Demo User</h5>
</div>
</div>
<div class="col-lg-8">
<form class="text-center">
<div class="form-group">
<label>Question asked by <strong>anonymous at 26/2/2021 10:55</strong></label>
<textarea class="form-control" rows="5" readonly>Lorem ipsum dolor sit amet, consectetur adipisicing elit, sed do eiusmod tempor incididunt ut labore et dolore magna aliqua.</textarea>
</div>
<div class="form-group">
<label>Demo User Response</label>
<textarea class="form-control" rows="5" readonly>Ut enim ad minim veniam, quis nostrud exercitation ullamco laboris nisi ut aliquip ex ea commodo consequat</textarea>
</div>
<a href="#"><button type="button" class="btn btn-success">Back to Demo User Profile</button></a>
</form>
</div>
</div>
</div>
{% endblock %}
When we run our app.py file we should get a response similar to the image below in our browser:

Get our popular Git Cheat Sheet for free!
You'll find the most important commands on the front and helpful best practice tips on the back. Over 100,000 developers have downloaded it to make Git a little bit easier.

About Us
As the makers of Tower, the best Git client for Mac and Windows, we help over 100,000 users in companies like Apple, Google, Amazon, Twitter, and Ebay get the most out of Git.
Just like with Tower, our mission with this platform is to help people become better professionals.
That's why we provide our guides, videos, and cheat sheets (about version control with Git and lots of other topics) for free.