
In "10% More Productive", we share tips on how to become more competent and efficient with the tools we use daily. Today we will put the spotlight on Sublime Text, one of the most popular text editors out there.
New Series: "10% More Productive"
This is part 2 of our series titled "10% More Productive". Be sure to check out our tips on:
- Mastering the Keyboard
- Mastering Sublime Text ← you are here!
- Mastering the Terminal
- Mastering Tower for Mac
- Mastering Google (for Developers)
- Mastering macOS
- Mastering SEO for Developers
- Mastering Tower for Windows
Sign up for our newsletter to get notified about the next episode!
Sublime Text, currently in version 4, was released in 2008 and quickly took the world by storm. Here are some of its most noteworthy features:
- Multi-Selection: with the power of multiple selections and cursors, mass editing can be easily performed;
- Performance: with lightning-fast startup time, Sublime can handle files with thousands of lines without any hiccups;
- Extensibility: thousands of plugins (known as packages in the ST world) have been developed by the community, providing extra features and further customization depending on your needs.
"Hot Exit" is another feature worth mentioning and one of my favorites in Sublime. This enables ST to exit immediately without any prompts, preserving all changes to the document and even unsaved files for the next time the editor is launched. I find it great for writing down quick thoughts.
Today I will share the most essential commands to quickly get things done and some customization you should look into. I will also list some of my favorite themes and packages.
Time for a deep dive on Sublime Text!
1. Keyboard Shortcuts
As expected from a competent text editor, Sublime comes with a plethora of keyboard shortcuts that you should learn and take advantage of. If you have a hard time memorizing new shortcuts, have a look at part 1 of our series for some keyboard-related tips.
Quick Text Selection
As mentioned in the introduction, Sublime is extremely powerful when it comes to selecting text, due to the multi-selection feature. Below you can find some of the best ways to quickly select text.
Select Multiple Instances of the Same Word ⌘ + D (CTRL + D on Windows)
As soon as you type ⌘ + D, the entire word will be selected. Sometimes, I use this shortcut to simply highlight a word, but if you press this shortcut multiple times, it will look for the next instance of the same word and select it.
With the help of multiple cursors, you can then easily change every highlighted instance in a single take.
If you would like to skip one of the instances, there is another nifty keyboard shortcut to consider: ⌘ + K. You will still need to press ⌘ + D to highlight the instance first, but you can then choose to ignore it by following up with ⌘ + K.
Select All Instances of the Same Word ⌃ + ⌘ + G (Alt + F3 on Windows)
If you're certain that you want to select all identical blocks of text in the document, ⌃ + ⌘ + G will get the job done much quicker than by pressing ⌘ + D multiple times.
This command is aptly named "Quick Find All".
Alternatively, you can use "Find". First, press ⌘ + F to open the "Find" bar at the bottom. Then, type the word you would like to select in the document and hit ⌥ + ↩. This will also select every instance for easy editing.
A handy solution when you know such words are present somewhere in the document, but you can't find them right away.
Make Multiple Selections ⌘ + CLICK (CTRL + CLICK on Windows)
To take advantage of the powerful Multi-Selection feature, hold ⌘ and use the mouse to add multiple cursors. You can then make multiple edits in a single take.
Select the Entire Line ⌘ + L (CTRL + L on Windows)
To select the entire line, ⌘ + L is your friend. Sublime will place the cursor at the beginning of the line immediately below.
Place a Cursor at the End of Each Line Selected ⇧ + ⌘ + L (⇧ + CTRL + L on Windows)
This command will break a multi-line selection and add a cursor at the end of each line. You can then modify all lines simultaneously.
This is very useful when you need to quickly edit lists.
Tip: If you need to edit the beginning of each line, you can easily jump to the beginning by pressing ⌘ + ←.
Expand Selection to Brackets ⇧ + ⌃ + M (⇧ + CTRL + M on Windows)
This shortcut will quickly select the entire block of text within a set of {} or [] (but not the brackets themselves). Very useful while coding!
If you prefer to expand that selection to scope, you can go for ⇧ + ⌘ + SPACE (or ⇧ + CTRL + SPACE on Windows). All text within the nearest [], (), "", or '' will be selected (including the symbols themselves).
Not a Tower user yet?
Download our 30-day free trial and experience a better way to work with Git!
Quick Text Manipulation
Now that you are aware of the multiple ways you can highlight text in Sublime, let's have a look at text manipulation.
Cutting / Copying Entire Lines ⌘ + X / ⌘ + C (CTRL + X / CTRL + C on Windows)
If you need to cut/copy the entire line, simply press ⌘ + X / ⌘ + C. I also rely on the "Cut Line" command to quickly delete a line I don't need anymore.
Duplicate a Text Selection ⇧ + ⌘ + D (⇧ + CTRL + D on Windows)
To quickly duplicate a portion of text, highlight it and press ⇧ + ⌘ + D.
This can also be applied to lines. Similarly to "Cutting/Copying Entire Lines", described in the previous step, if you press ⇧ + ⌘ + D without selecting anything the entire line will be duplicated, like in the example below.
To Move Lines Up / Down ⌥ + ⌘ + ↑ / ⌥ + ⌘ + ↓ (⇧ + CTRL + ↑ / ⇧ + CTRL + ↓ on Windows)
This is one of my most frequently-used commands. ⌥ + ⌘ + ↑ / ⌥ + ⌘ + ↓ quickly moves the current line up or down.
To Convert Text to Upper Case ⌘ + K , ⌘ + U (CTRL + K , CTRL + U on Windows)
Sublime offers the possibility to quickly convert text between different letter cases. Since I remapped the Caps Lock key to the Hyper Key (as described here), Upper Case conversion (⌘ + K , ⌘ + U) is the one I most frequently use.
⌘ + K , ⌘ + L will work when you need Lower Case conversion (CTRL + K , CTRL + L on Windows).
Keep in mind that this is a combination of two keystrokes that should be pressed in succession. ⌘ + K initiates a special action that expects the second key of chord. This increases the number of keyboard shortcuts you can use!
Useful Shortcuts to Know
While I believe that text selection and manipulation are the two most important topics to focus on, there are many other keyboard shortcuts available in Sublime that are worth a look at.
Here are some of my favorites.
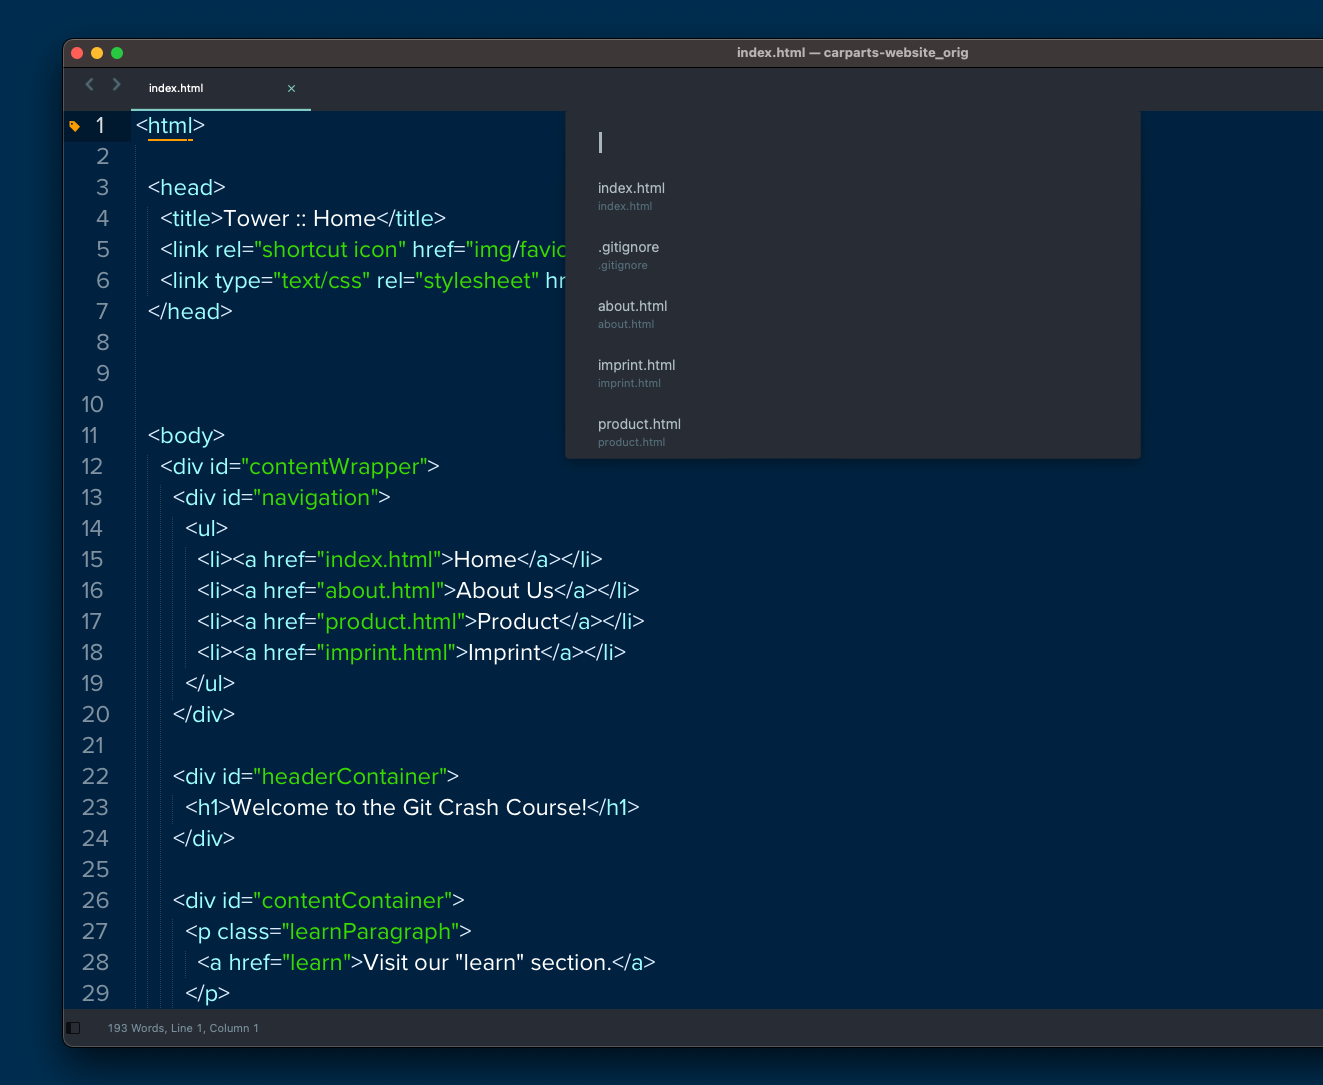
Navigate to Other Project Files ⌘ + P (CTRL + P on Windows)
To quickly go to any file in your project, ⌘ + P is a life-saver (⌘ + T will also work).
Just start typing part the name of the file and Sublime's fuzzy file search magic will do the rest. Much faster than using the sidebar, wouldn't you agree?
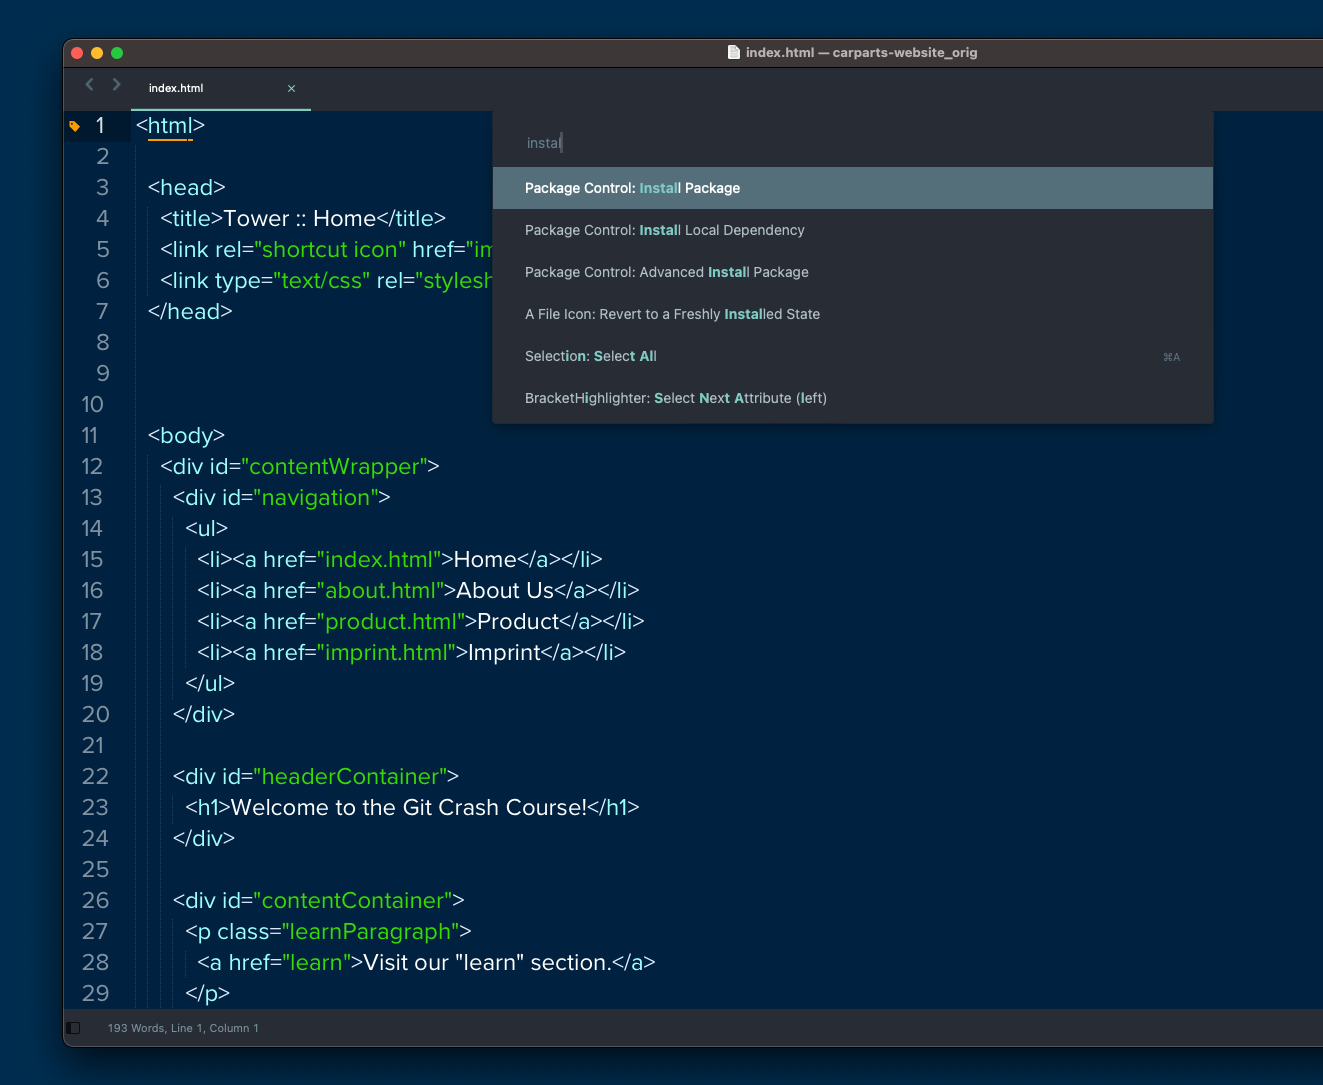
Open the Command Palette ⇧ + ⌘ + P (⇧ + CTRL + P on Windows)
The Command Palette is one of the most powerful panels in Sublime.
By simply typing the desired command, the Command Palette enables you to perform the majority of actions available in ST without your hands ever leaving the keyboard.
The Command Palette also supports fuzzy search, so you can partially type the command you are looking for.
Toggle the Sidebar ⌘ + K , ⌘ + B (CTRL + K , CTRL + B on Windows)
As you become more and more proficient with Sublime and its "Goto Anything" command, you will notice that the sidebar doesn't need to stay visible at all times.
You can quickly toggle its visibility by pressing ⌘ + K followed by ⌘ + B.
Split the Sublime Window into Multiple Columns ⌘ + ⌥ + NUMBER (ALT + ⇧ + NUMBER on Windows)
You can split the main window in Sublime into multiple columns by pressing the following:
- ⌘ + ⌥ + 1 to split into 1 columns;
- ⌘ + ⌥ + 2 to split into 2 columns;
- ⌘ + ⌥ + 3 to split into 3 columns;
- ⌘ + ⌥ + 4 to split into 4 columns.
I find this useful when you want to perform small edits on multiple files simultaneously.
Tip: You can also press SHIFT to split into rows instead of columns.
2. Settings
Like in most applications, Sublime Text's preferences can be accessed by pressing ⌘ + , when on the Mac. There is no keyboard shortcut assigned to this task for Windows or Linux users, but you can open the Command Palette (⇧ + ⌘ + P) and type "pref" to quickly access the settings file.
Contrary to most applications though, you won't find a point and click menu. Even the settings in ST are text-based (in JSON format). One important advantage of this approach is that you can easily share or export these settings to conveniently bring them to different machines, or experiment with other users' settings.
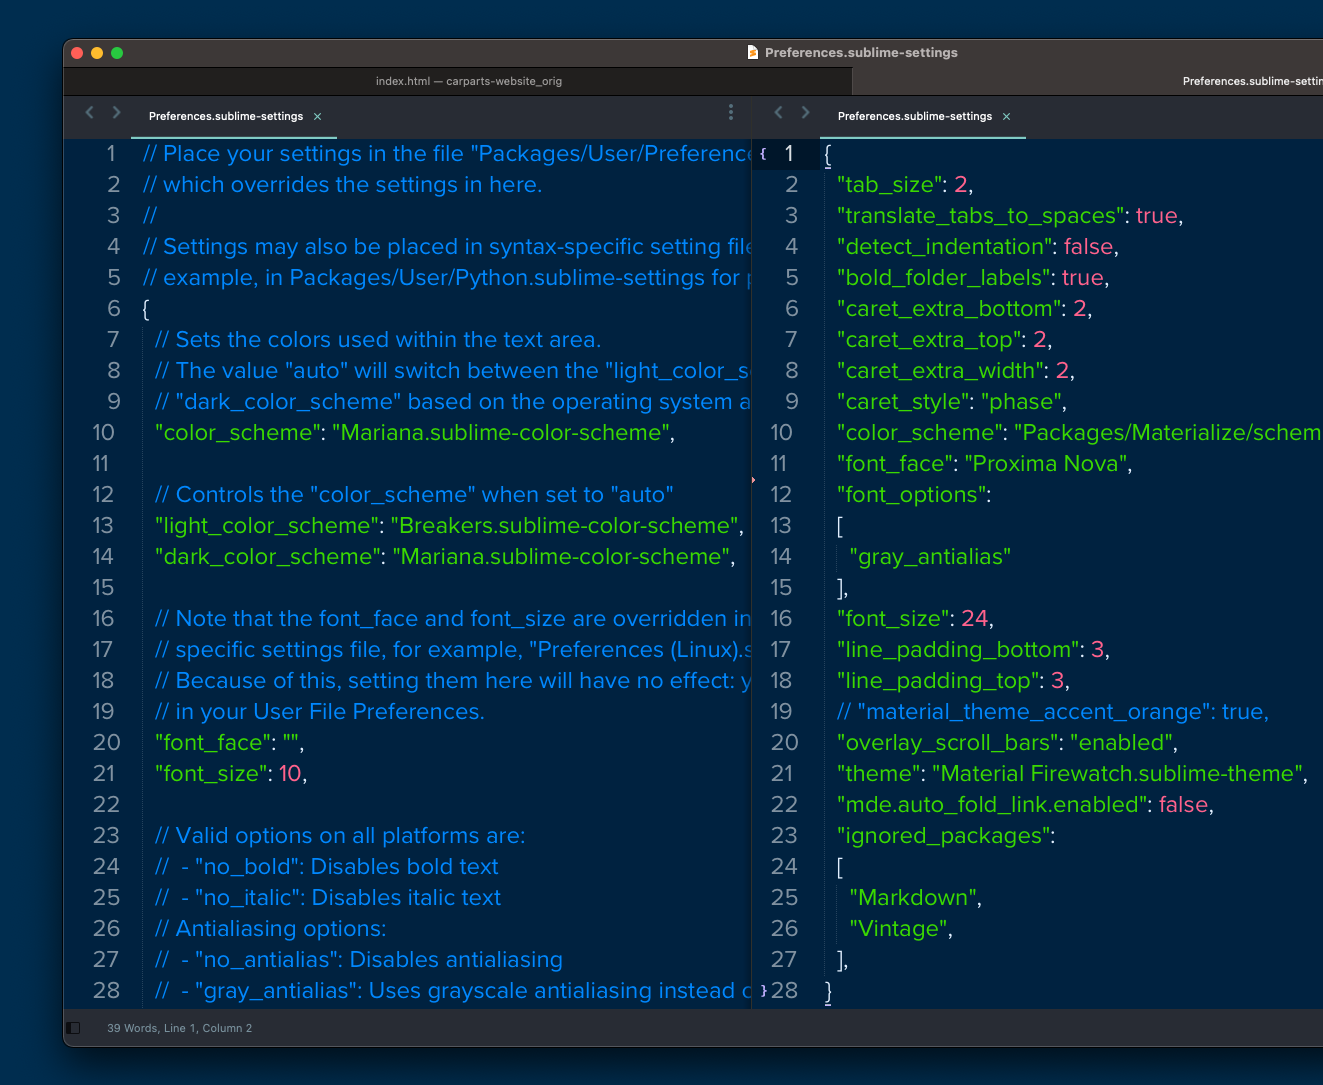
You will see 2 screens. On the left column (Preferences > Settings - Default), you will find the full list of ST's options. You should have a look at what you would like to change and then modify its values using the column on the right (Preferences > Settings - User), which refers to your own settings. This is how you override the defaults.
If you're curious, here are my specific settings. They are mainly aesthetic enhancements. They are slightly different from the screenshot I shared above, as I did some tweaks specifically for this article.
{
  "tab_size": 2,
  "translate_tabs_to_spaces": true,
  "detect_indentation": false,
  "bold_folder_labels": true,
  "caret_extra_bottom": 2,
  "caret_extra_top": 2,
  "caret_extra_width": 2,
  "caret_style": "phase",
  "color_scheme": "Packages/Color Scheme - Default/Celeste.sublime-color-scheme",
  "font_face": "Victor Mono",
  "font_options":
  [
    "gray_antialias"
  ],
  "font_size": 22,
  "line_padding_bottom": 3,
  "line_padding_top": 3,
  "material_theme_accent_orange": true,
  "overlay_scroll_bars": "enabled",
  "theme": "Material Firewatch.sublime-theme",
}
You can also configure your own Key Bindings this way. Default key bindings can be found in Preferences > Key Bindings - Default and you should add your own changes to the Preferences > Key Bindings - User file.
Finally, any plugin-specific preferences can be found under Preferences > Package Settings.
Sublime Text's Command Line Tool
Sublime Text includes a tool to work with files on the command line. That way, you can open files or projects in Sublime Text by simply typing subl, or use Sublime as the default text editor for unix tools.
Have a look at the Command Line Interface documentation to learn how to set it up on Windows, Mac, or Linux. It should only take you a couple of minutes and it will be well worth your time!
Not a Tower user yet?
Download our 30-day free trial and experience a better way to work with Git!
3. Themes and Color Schemes
Programmers and writers are expected to spend a lot of time in their favorite text editor. It might as well look good while we're at it!
Let's start by making a distinction between "Theme" and "Color Scheme". The former refers to the look of the UI (such as the appearance of buttons and tabs, or the sidebar), while the latter is specific to the way source code is highlighted. Both play an important part!
To work with themes, make sure you have Package Control installed. Opening the Command Palette (⇧ + ⌘ + P) and typing "Install Package Control" should do the trick on most setups.
You can then install any theme and activate it by editing the Preferences file. If you prefer, you can also open the Command Palette and use the "UI: Select Theme" option to make changes.
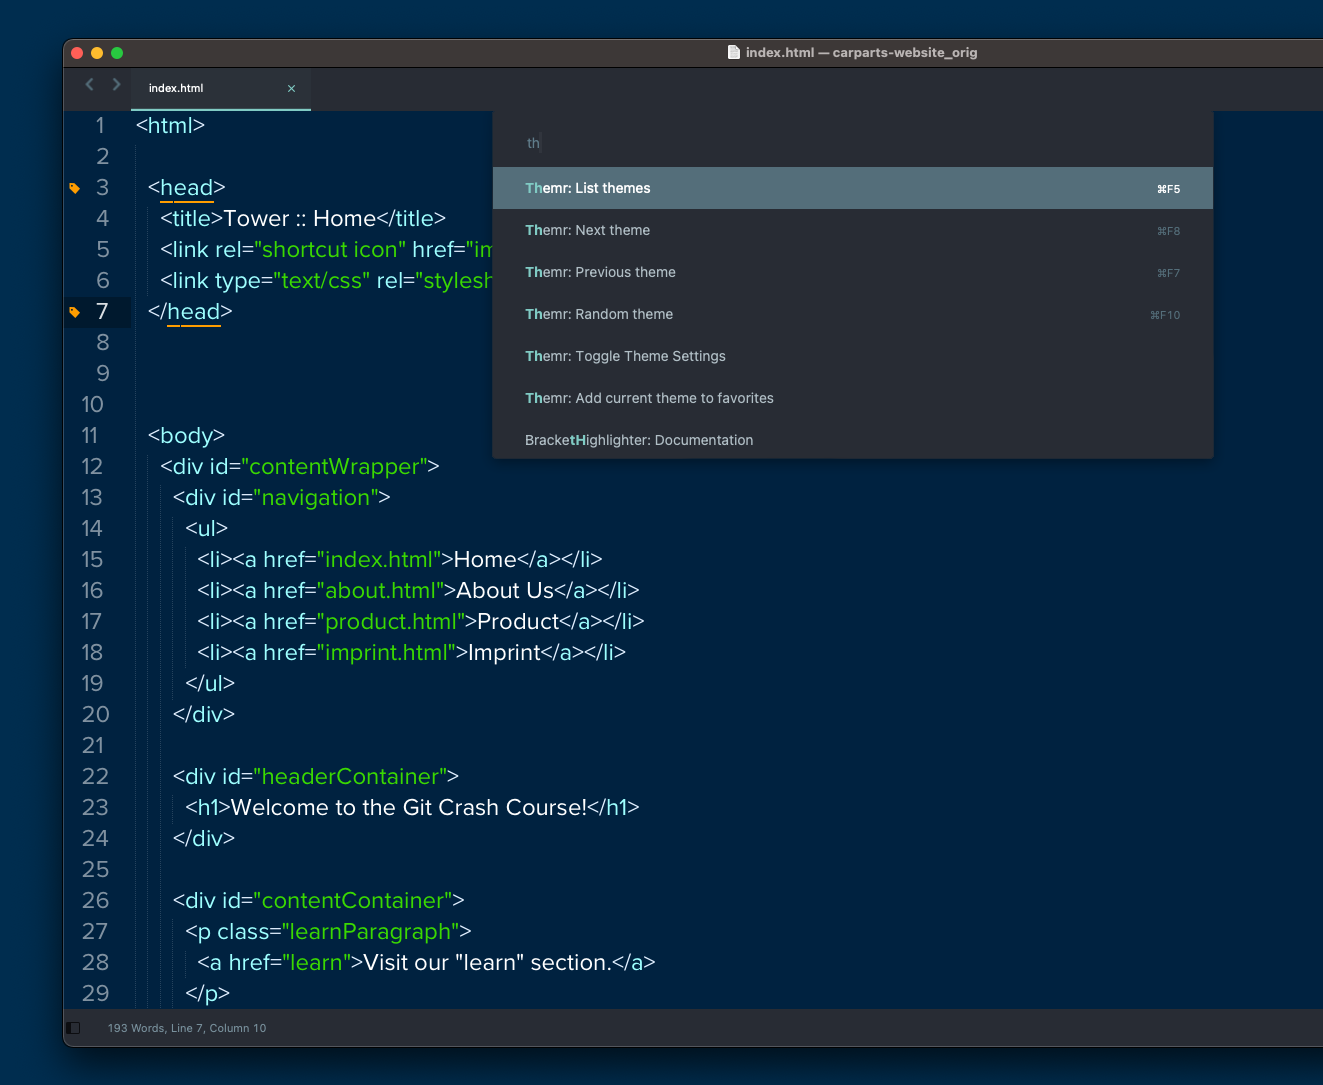
One other alternative is to use Themr, a package that lists all themes available in your computer and that allows easy switching.
There are many different themes available. Here are some of the most popular ones:
Even though it's been deprecated, Materialize has been my choice for many years, as I enjoy the different light and dark variants it provides.
As for color schemes, the one you see in every screenshot is Material Cobalt, which fits in nicely with the Tower Blog theme.
However, the one I usually default to is "Material Firewatch", which is bundled with the Material Theme and heavily inspired by Campo Santo's "Firewatch" videogame. I have a soft spot for orange!
That is my preferred color scheme while coding, but if I'm writing I may go for something lighter. Celeste is another favorite, which is part of the default color schemes pack that comes bundled with Sublime.
To quickly change color schemes, open the Command Palette (⇧ + ⌘ + P) and type "UI: Select Color Scheme". As you cycle through the options, you can instantly preview the new scheme.
4. Packages
There are thousands of packages available for Sublime — thanks to Package Control, installing them is a breeze. As mentioned in the previous chapter, make sure you already have Package Control installed before attempting to install anything else.
To install a package, all you need to do is open the Command Palette (⇧ + ⌘ + P) and type "Install Package", followed by the name of the package you are looking for.
I strongly suggest you spend some time exploring the Package Control website. If you need something, chances are someone has already created a package that you can use.
That said, here are my favorite packages:
- BracketHighlighter: highlights a variety of brackets.
- Emmet: simply indispensable if you work with HTML/CSS.
- A File Icon: file-specific icons for improved visual grepping.
- Text Pastry: insert numeric sequences when using multiple cursors.
- Color Highlight: shows color codes with their real color as the background.
- Prettier: opinionated code formatter for HTML/CSS/JS/GraphQL/Markdown/YAML.
- SublimeLinter: code linting framework (you will need to add each linter individually).
- SideBarEnhancements: adds many operations when right-clicking on folders or files on the sidebar.
- WordCount: real-time Word, Char, Line and Page counter in the status bar for the document, line or selection.
Final Words
Sublime Text is a very complex editor with lots to learn. By practising what was presented here, you will be well on your way to master one of the most versatile and productive text editors out there.
I hope you enjoyed reading this article. I will be back soon with another episode of "10% More Productive"!
Join Over 100,000 Developers & Designers
Be the first to know about new content from the Tower blog as well as giveaways and freebies via email.