Connecting a Remote Repository
When you clone a repository from a remote server, Git automatically remembers this connection for you. It saves it as a remote called "origin" by default. Exactly as with the "master" branch, the name "origin" for this remote is only a naming convention. It's just a normal remote repository like any other.
In other cases where you started with a fresh local repository, no remote connections are saved. In that situation, we need to connect our local repository to a new remote before we can try some remote interactions.
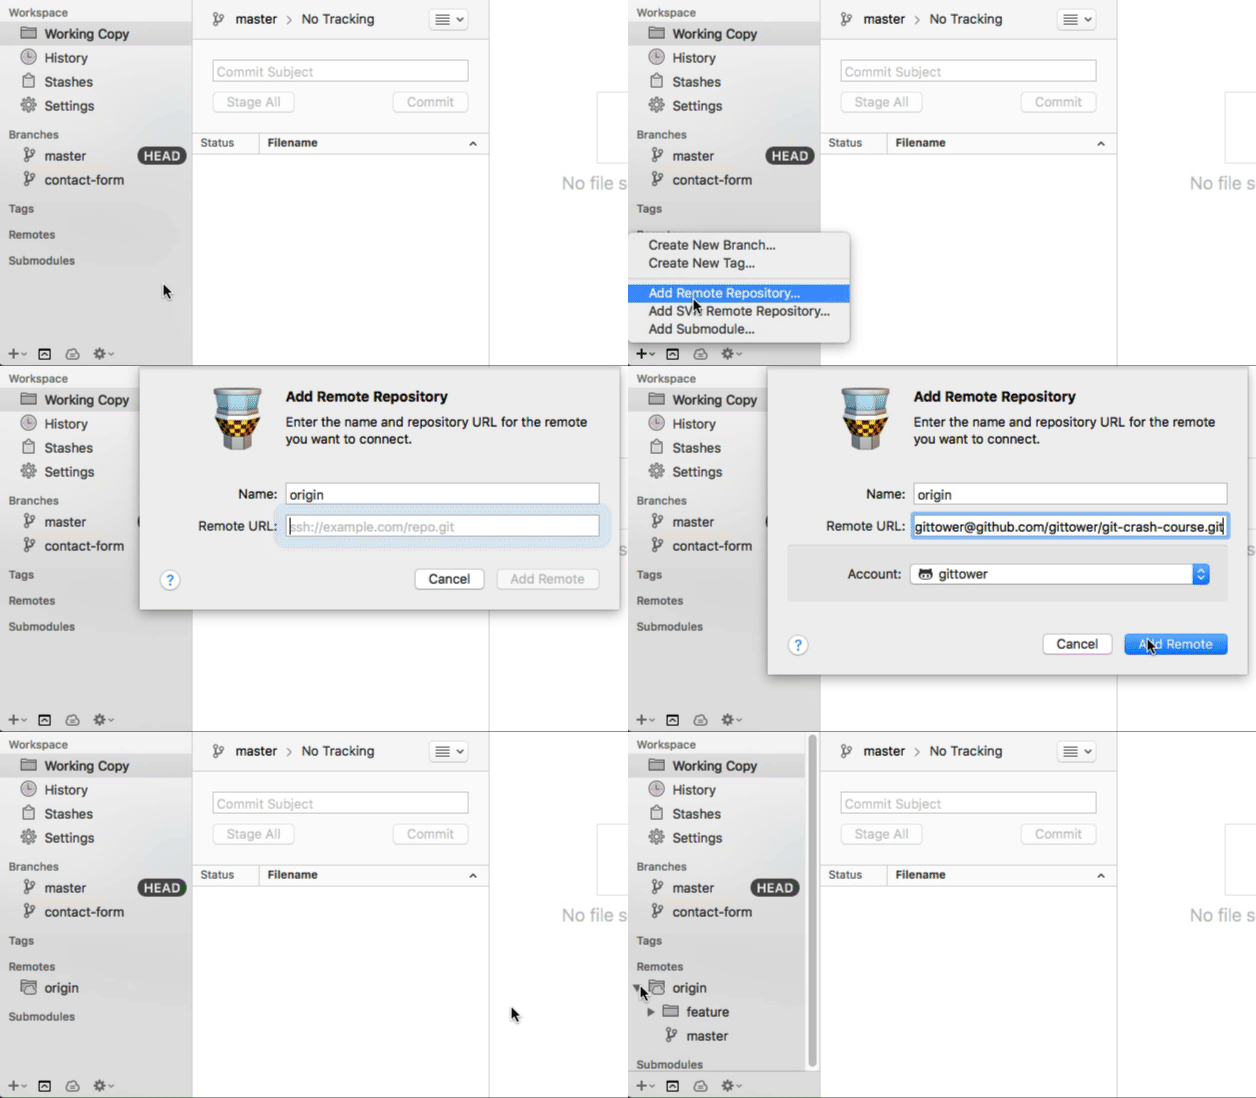
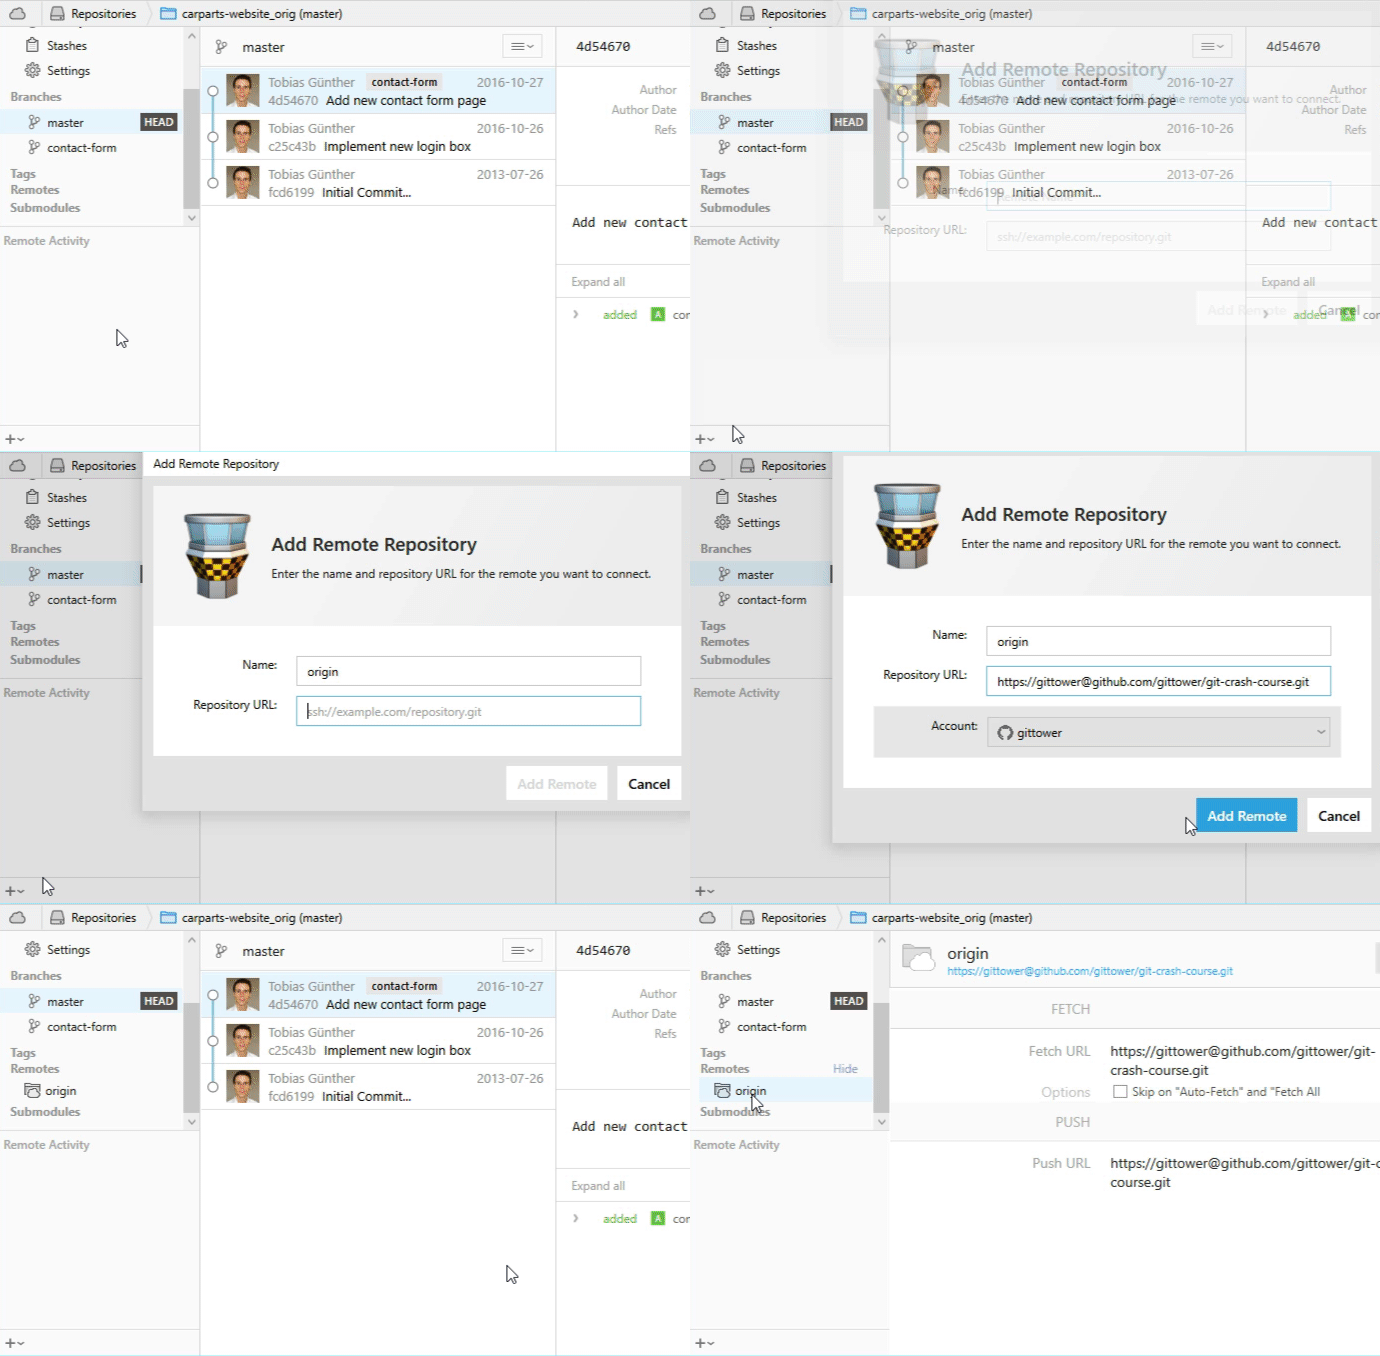
As an example, we'll connect a remote from GitHub (at the URL "https://github.com/gittower/git-crash-course-remote.git") and call it "origin":
With the local repository open in Tower, click the "+" button on the bottom of the toolbar and select "Add Remote Repository...". In the following dialog, you can enter your authentication details for this remote.


Note that you can connect as many remotes with a local repository as you like.
Get our popular Git Cheat Sheet for free!
You'll find the most important commands on the front and helpful best practice tips on the back. Over 100,000 developers have downloaded it to make Git a little bit easier.

About Us
As the makers of Tower, the best Git client for Mac and Windows, we help over 100,000 users in companies like Apple, Google, Amazon, Twitter, and Ebay get the most out of Git.
Just like with Tower, our mission with this platform is to help people become better professionals.
That's why we provide our guides, videos, and cheat sheets (about version control with Git and lots of other topics) for free.